Home » Having Arduino tell you when to water your plants
Having Arduino tell you when to water your plants
How to build a soil moisture sensor for your plants, getting notifications when they're dry.
Approximate reading time: 7 minutes
What is this?
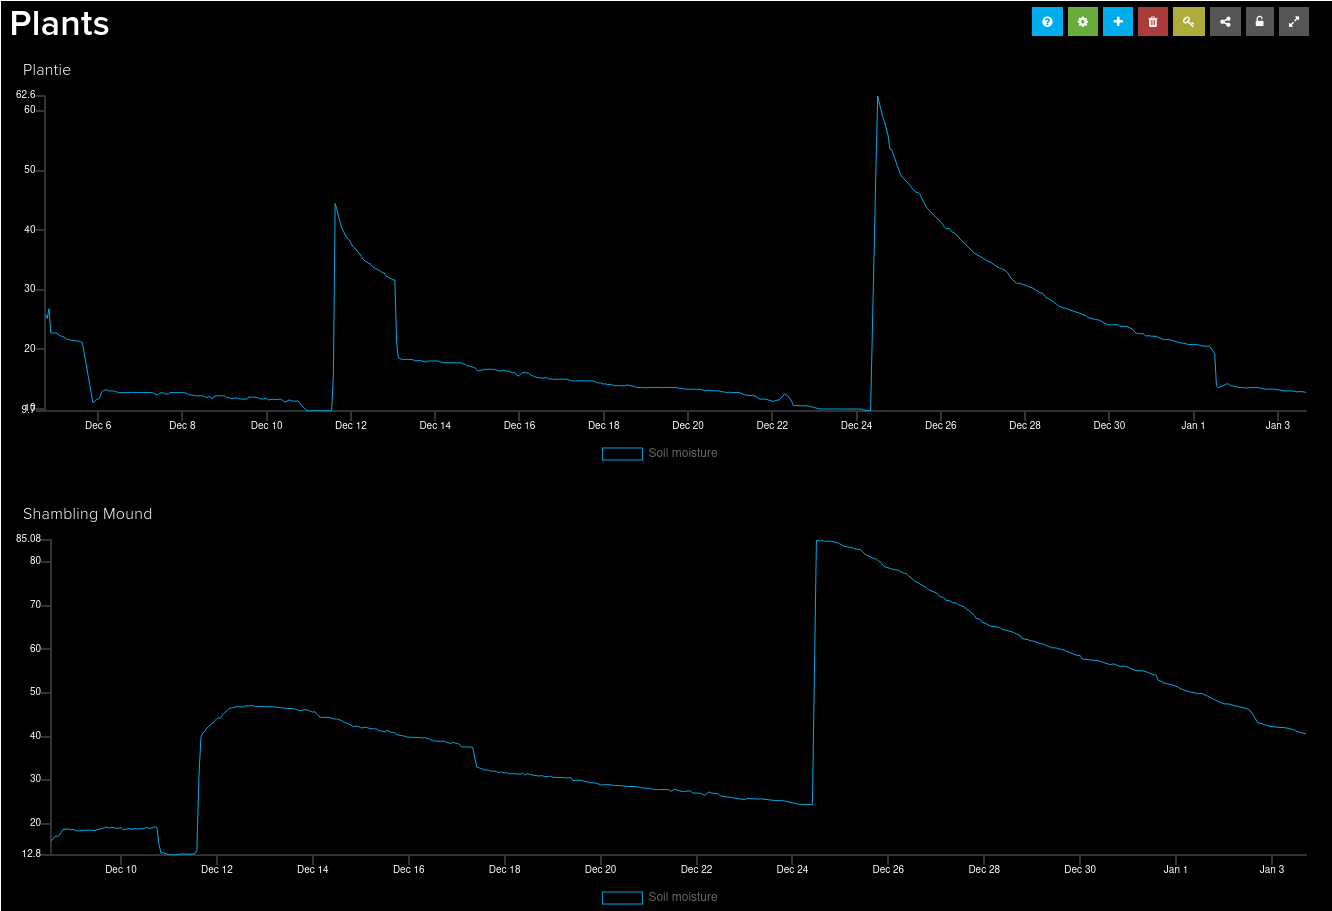
In this post I'll teach you how to connect a soil moisture sensor to the internet, building a dashboard for your plants like this one[archived]:
I'll also teach you how to connect the data stream to IFTTT[archived], so that you get notifications on your phone when your plants need watering. Keep reading!
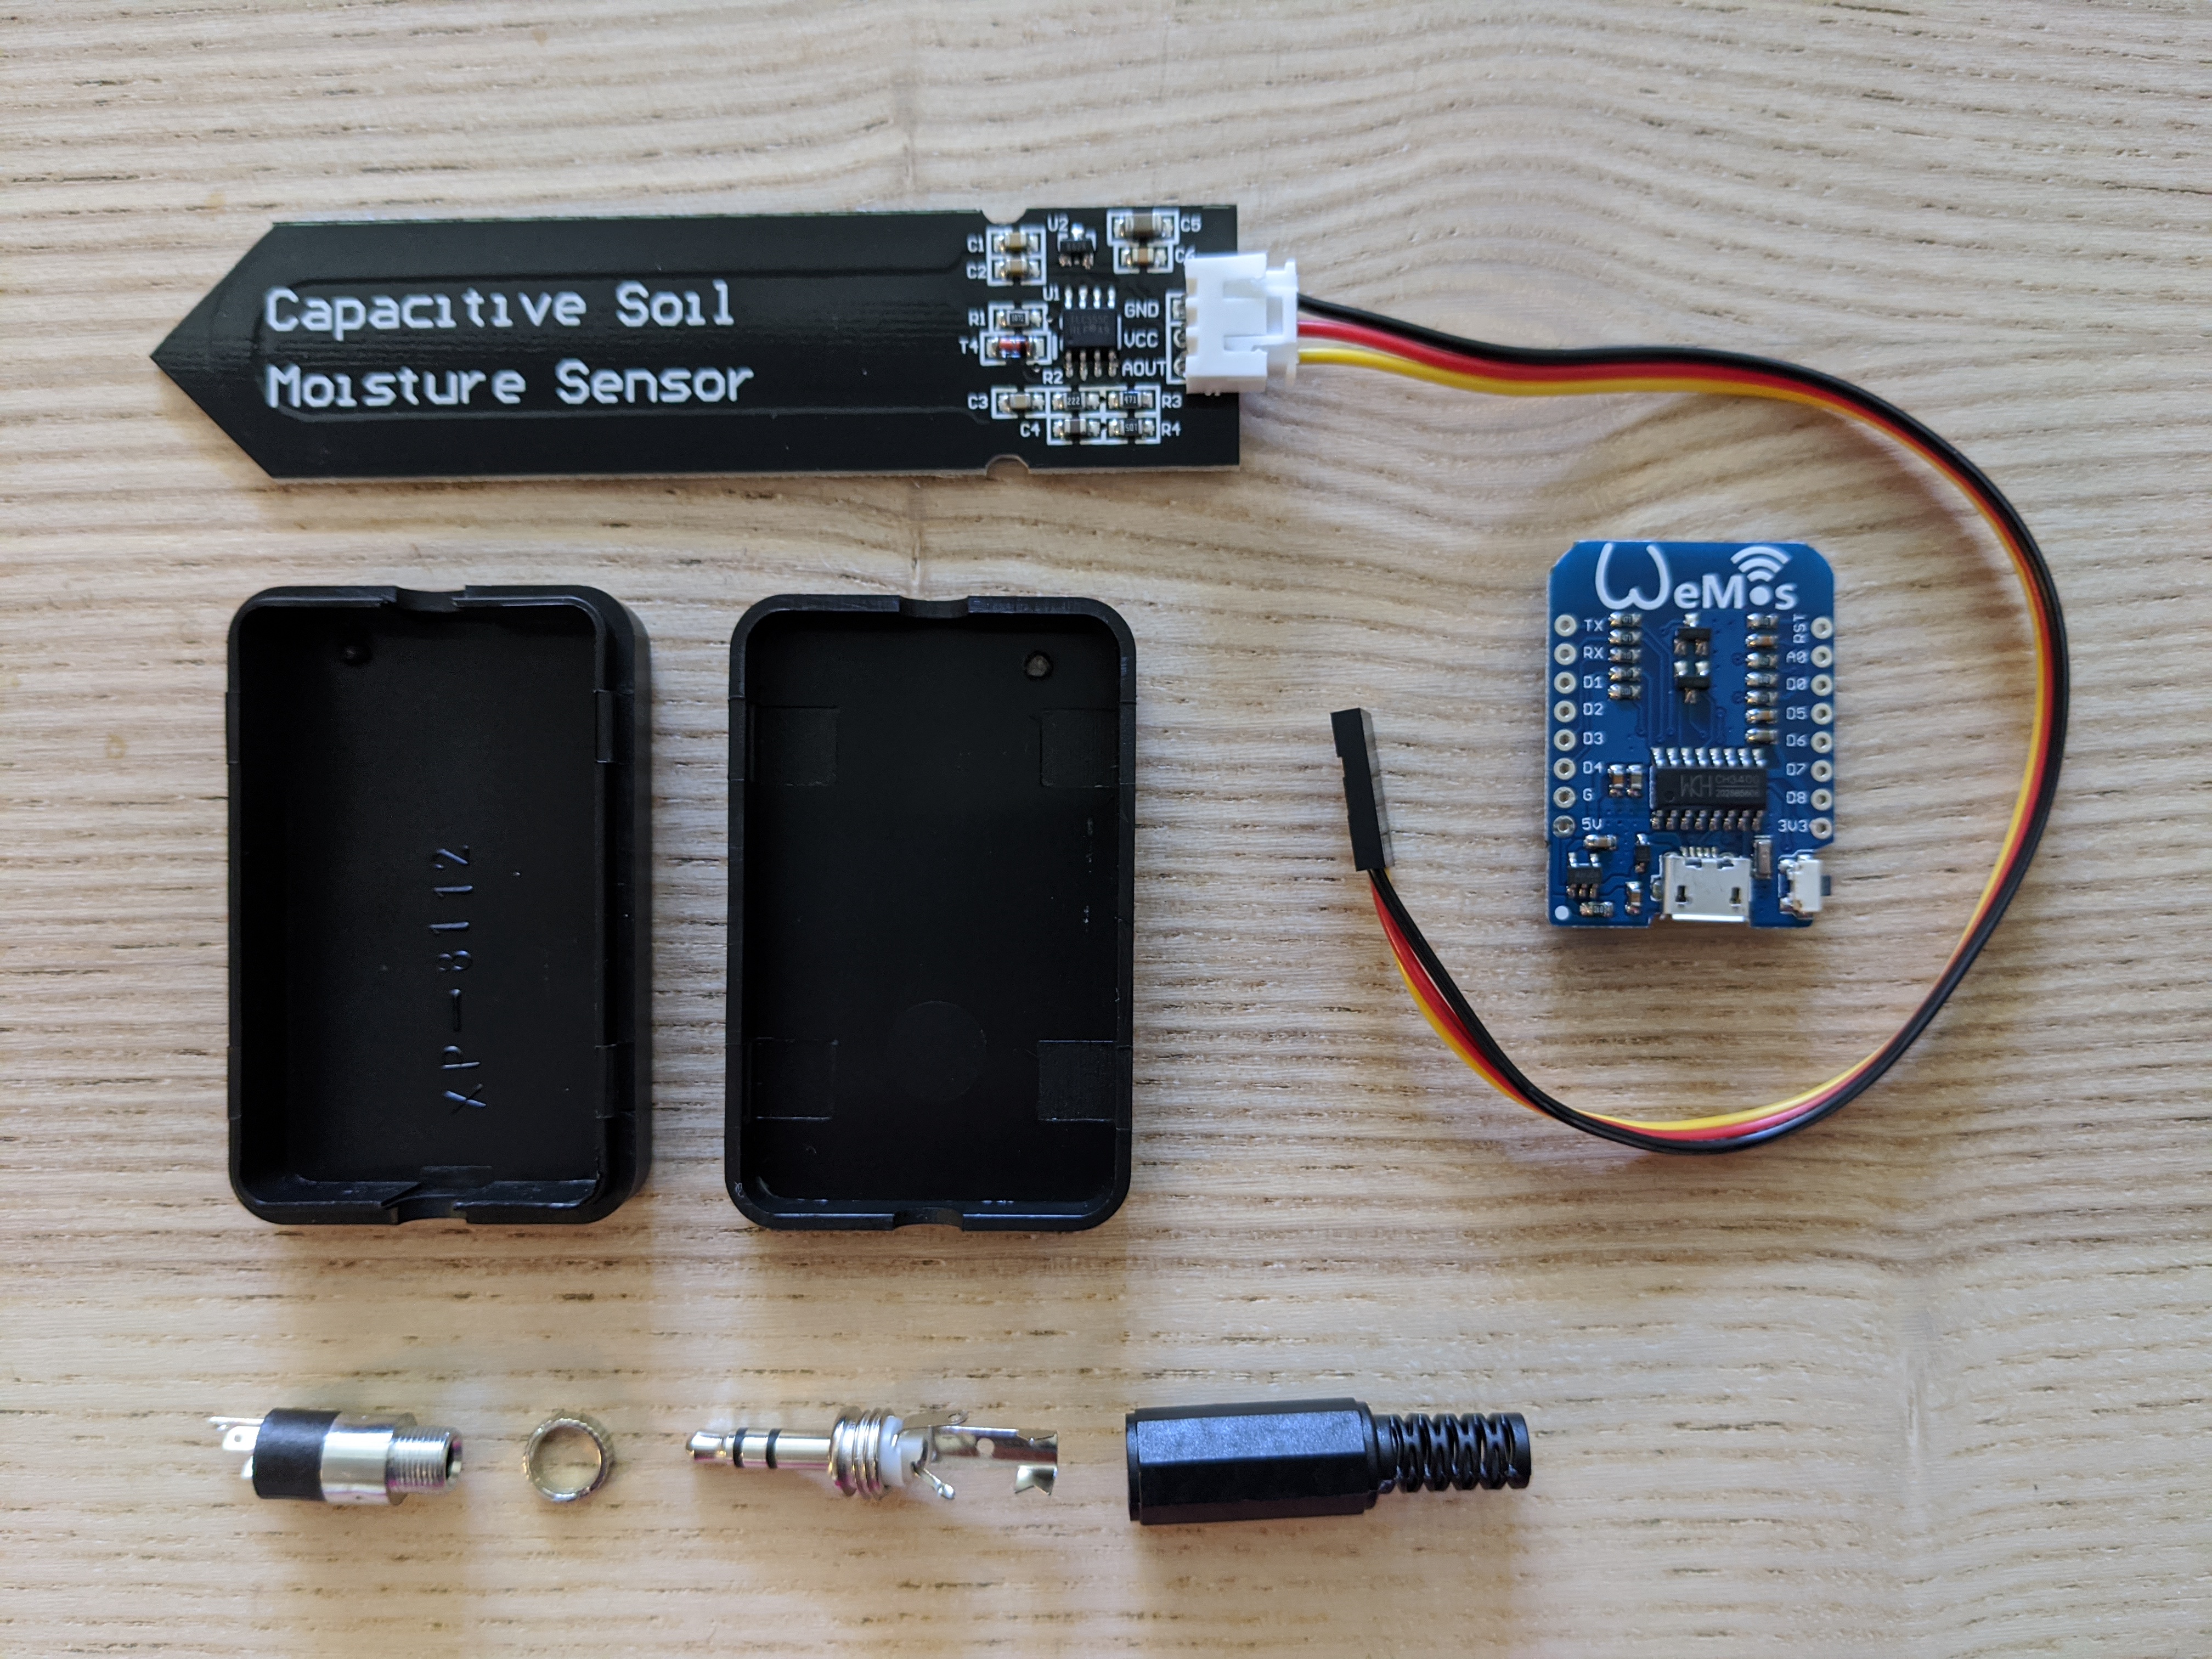
Bill of materials
This is a quick overview of everything you will need:
- An "Arduino" microprocessor. I used a Wemos D1 Mini[archived], which is technically not an Arduino, but it can be programmed using the Arduino IDE. The Wemos D1 Mini is cheap ESP8266[archived] board that can be programmed and powered over micro USB, and has everything you need to connect to your wifi and send the data over the internet.
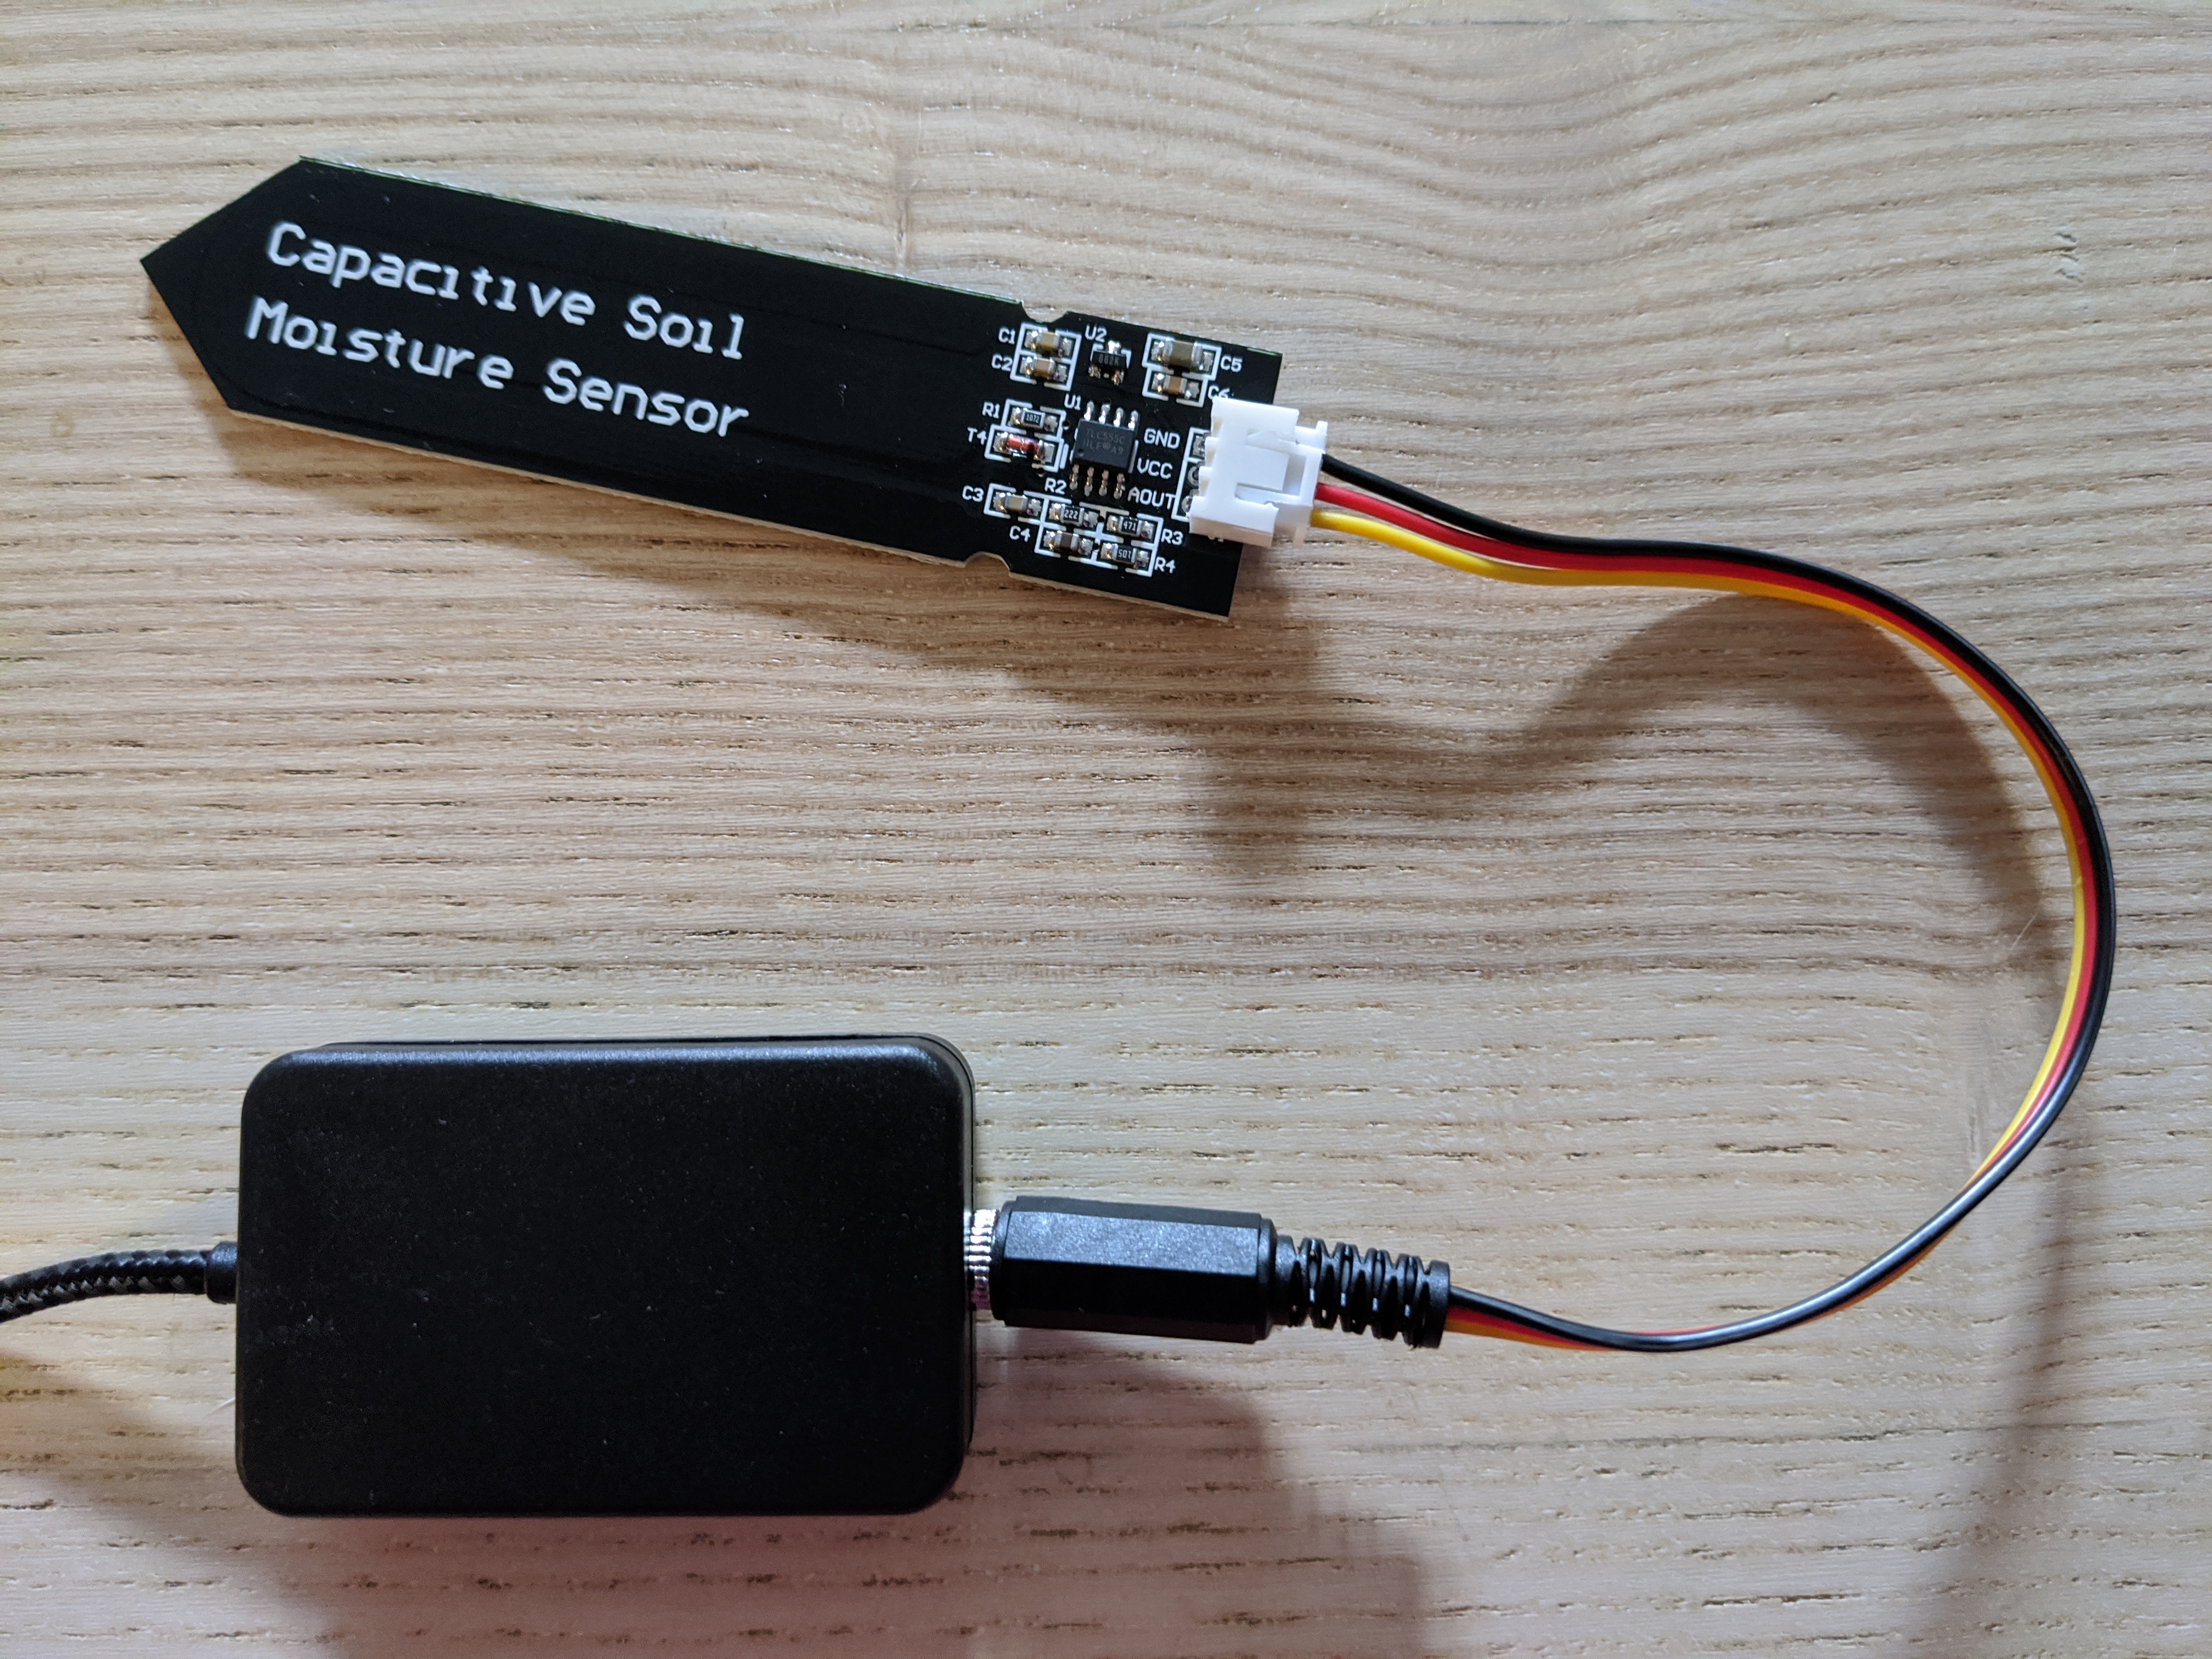
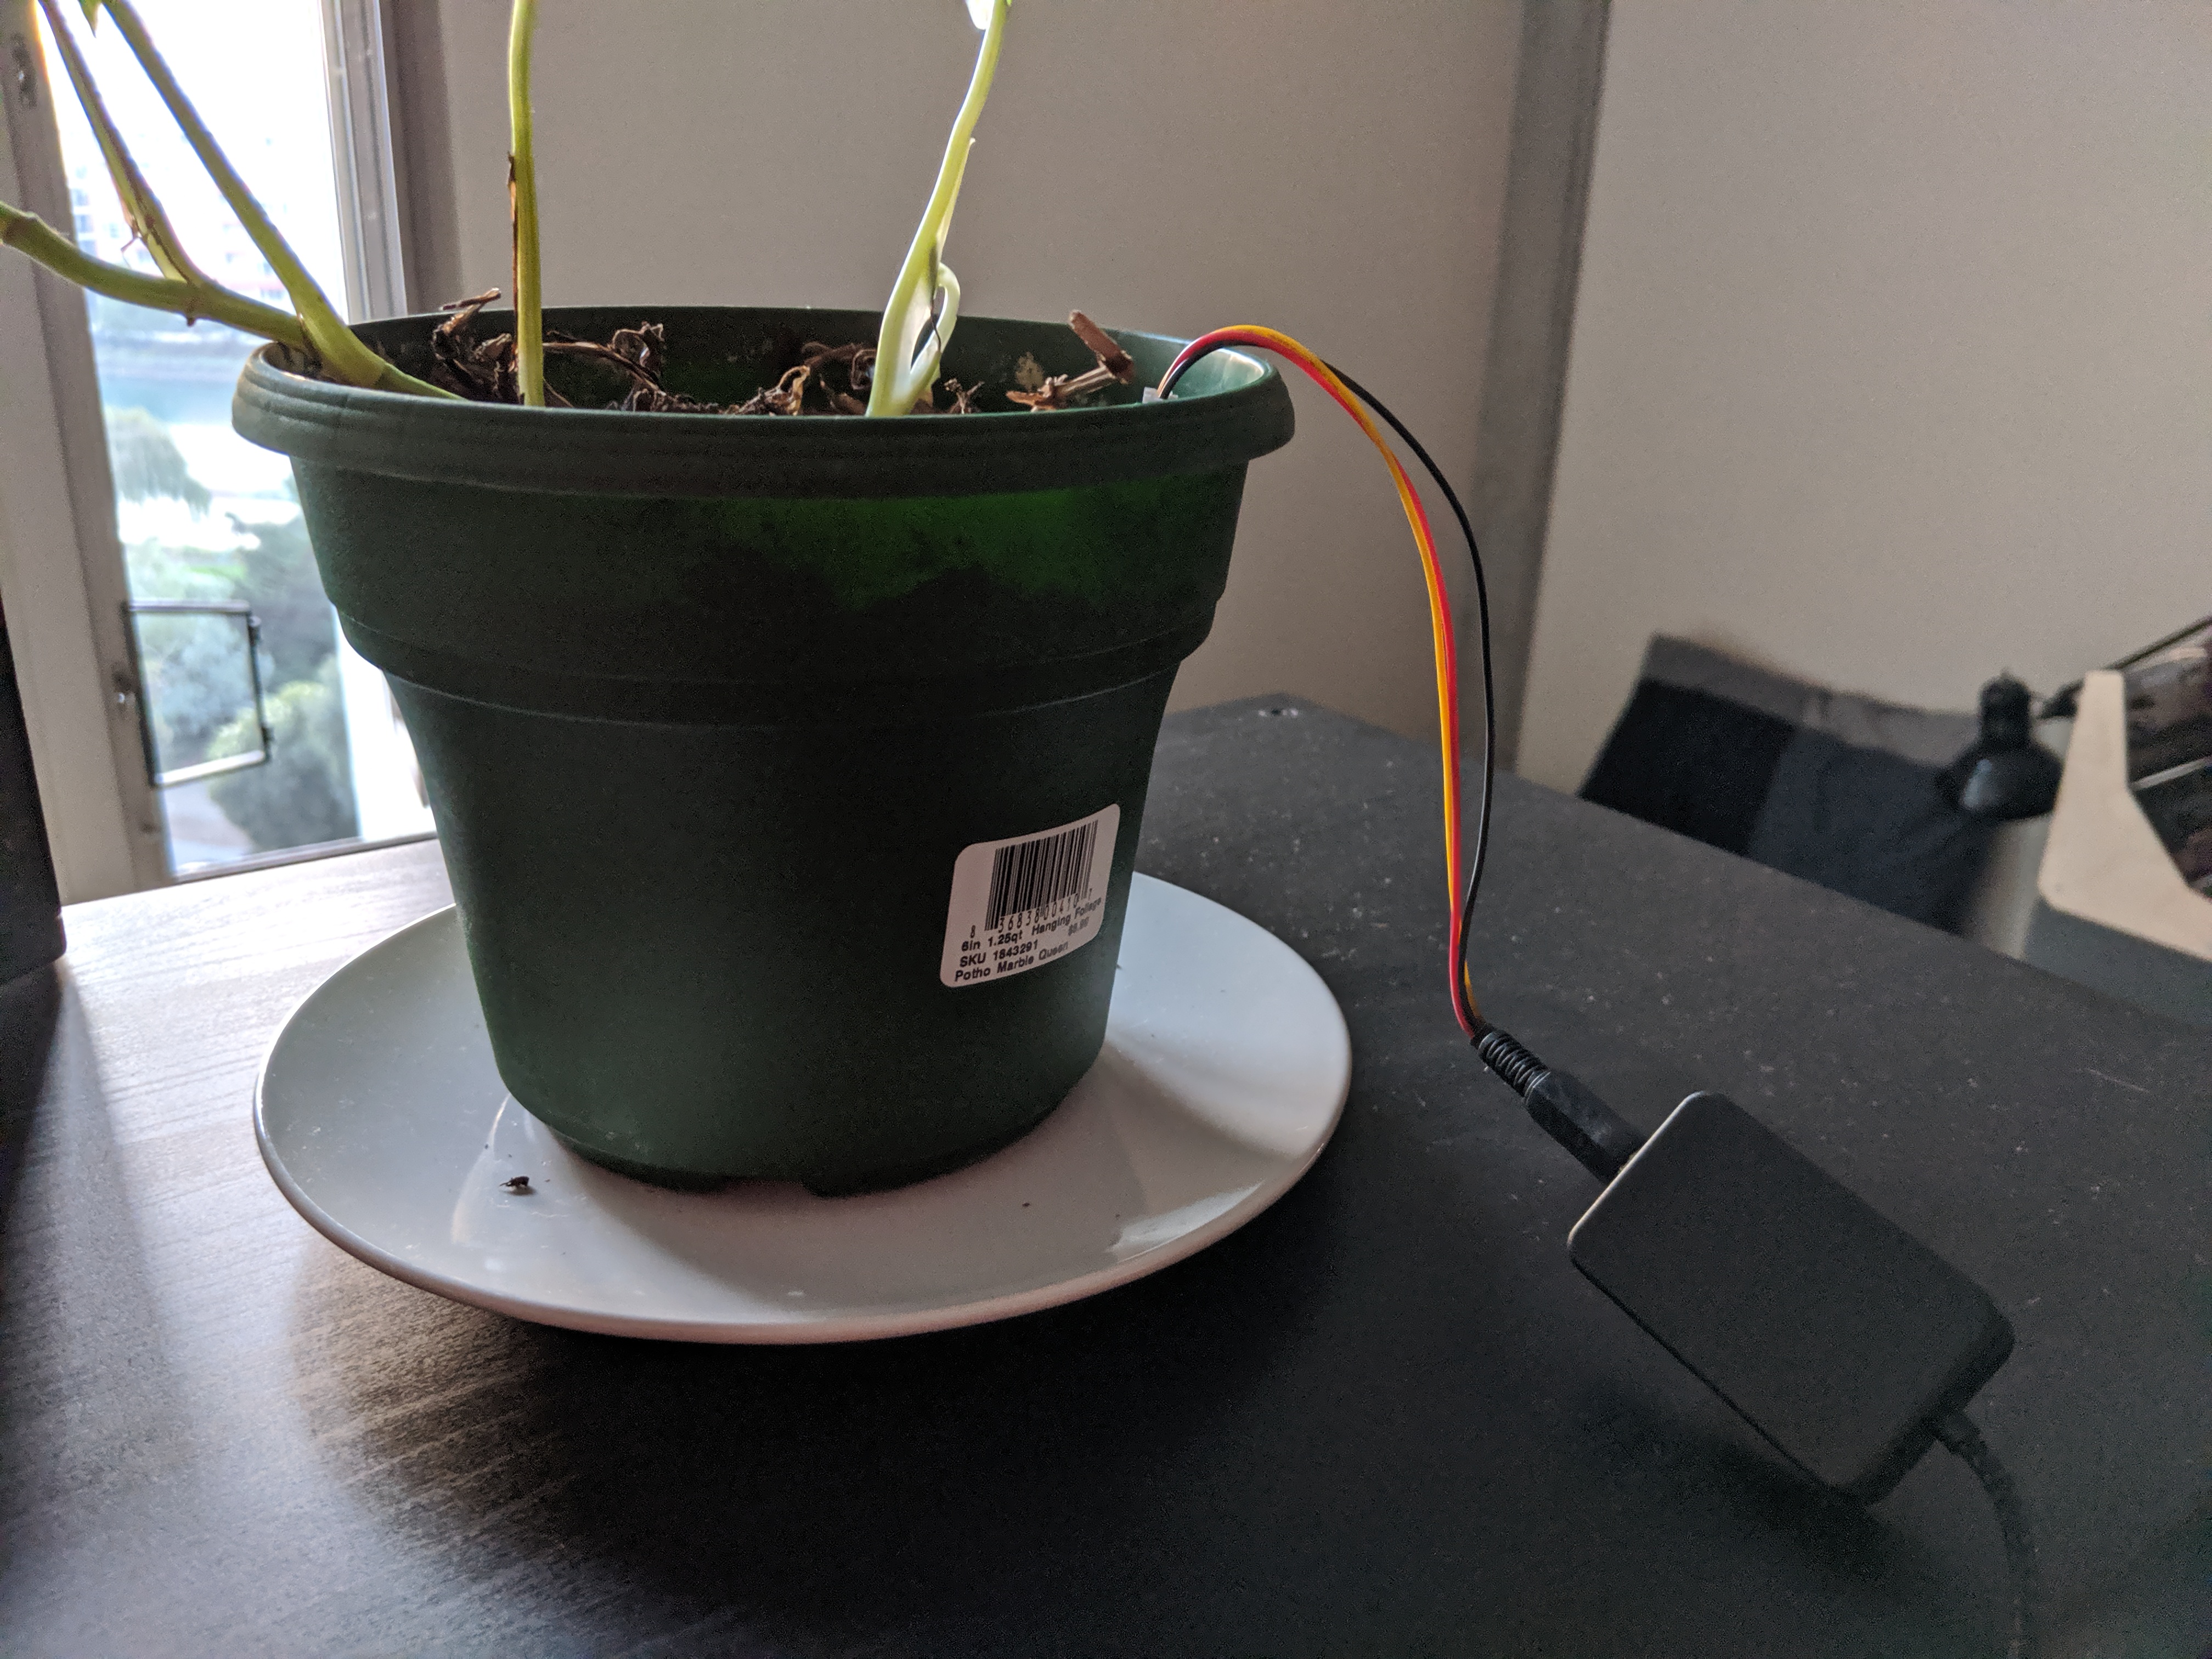
- A capacitive moisture sensor. I used this one[archived]. The sensor is inserted into the plant pot, and connects to the Arduino.
- A project box. I love these little project boxes[archived], since they're the perfect size for the Wemos D1 Mini. You just need to make sure the micro USB connector used to power the board is not too big, since it's a tight fit.
Optional, but nice to have:
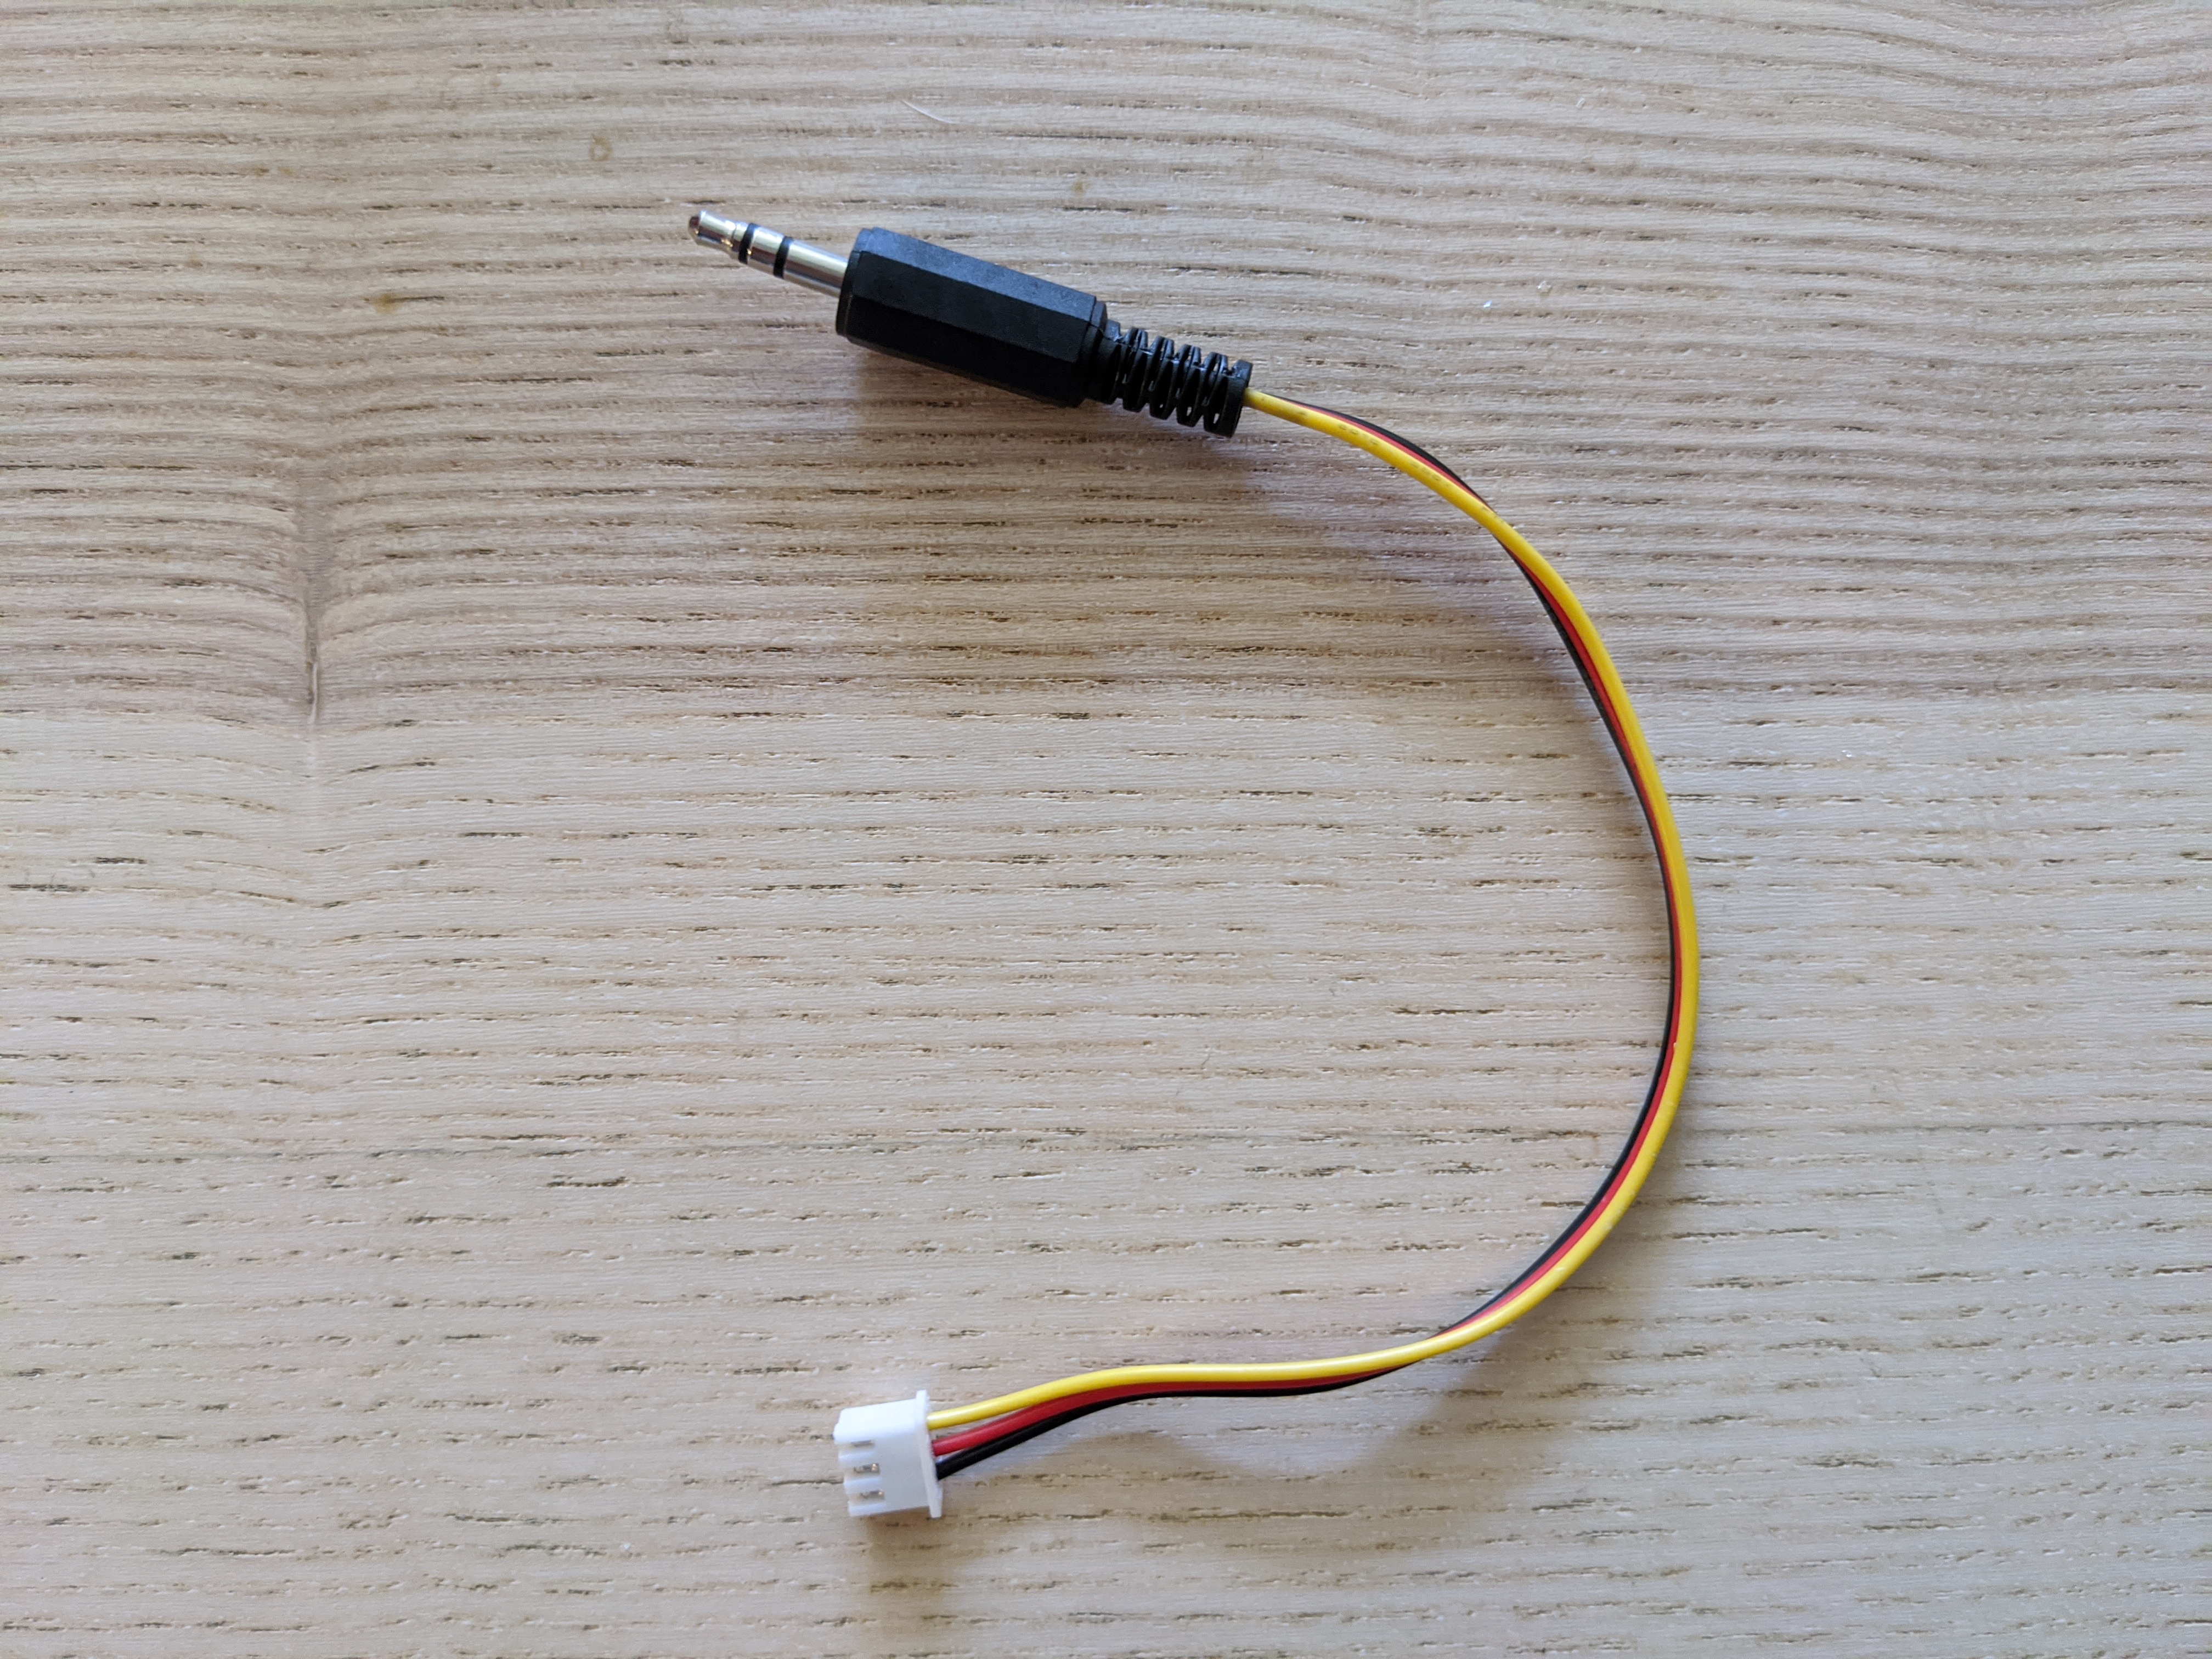
- A jack, like this one[archived]. Using a jack you can connect and disconnect the sensor from the project box, which makes it easier to rellocate pots.
- A plug, like this one[archived]. The plug is connected to the wires coming from the sensor, and plugs into the jack on the project box.
- Heat shrink tubing for the plug, to protect the soldered wires.
If you don't have the jack and the plug you can solder the sensor wires directly to the Arduino.
Other small things you need:
- A micro USB cable, for powering the Arduino.
- Wires, solder, soldering iron.
Here's a view of everything:
Preparing the sensor
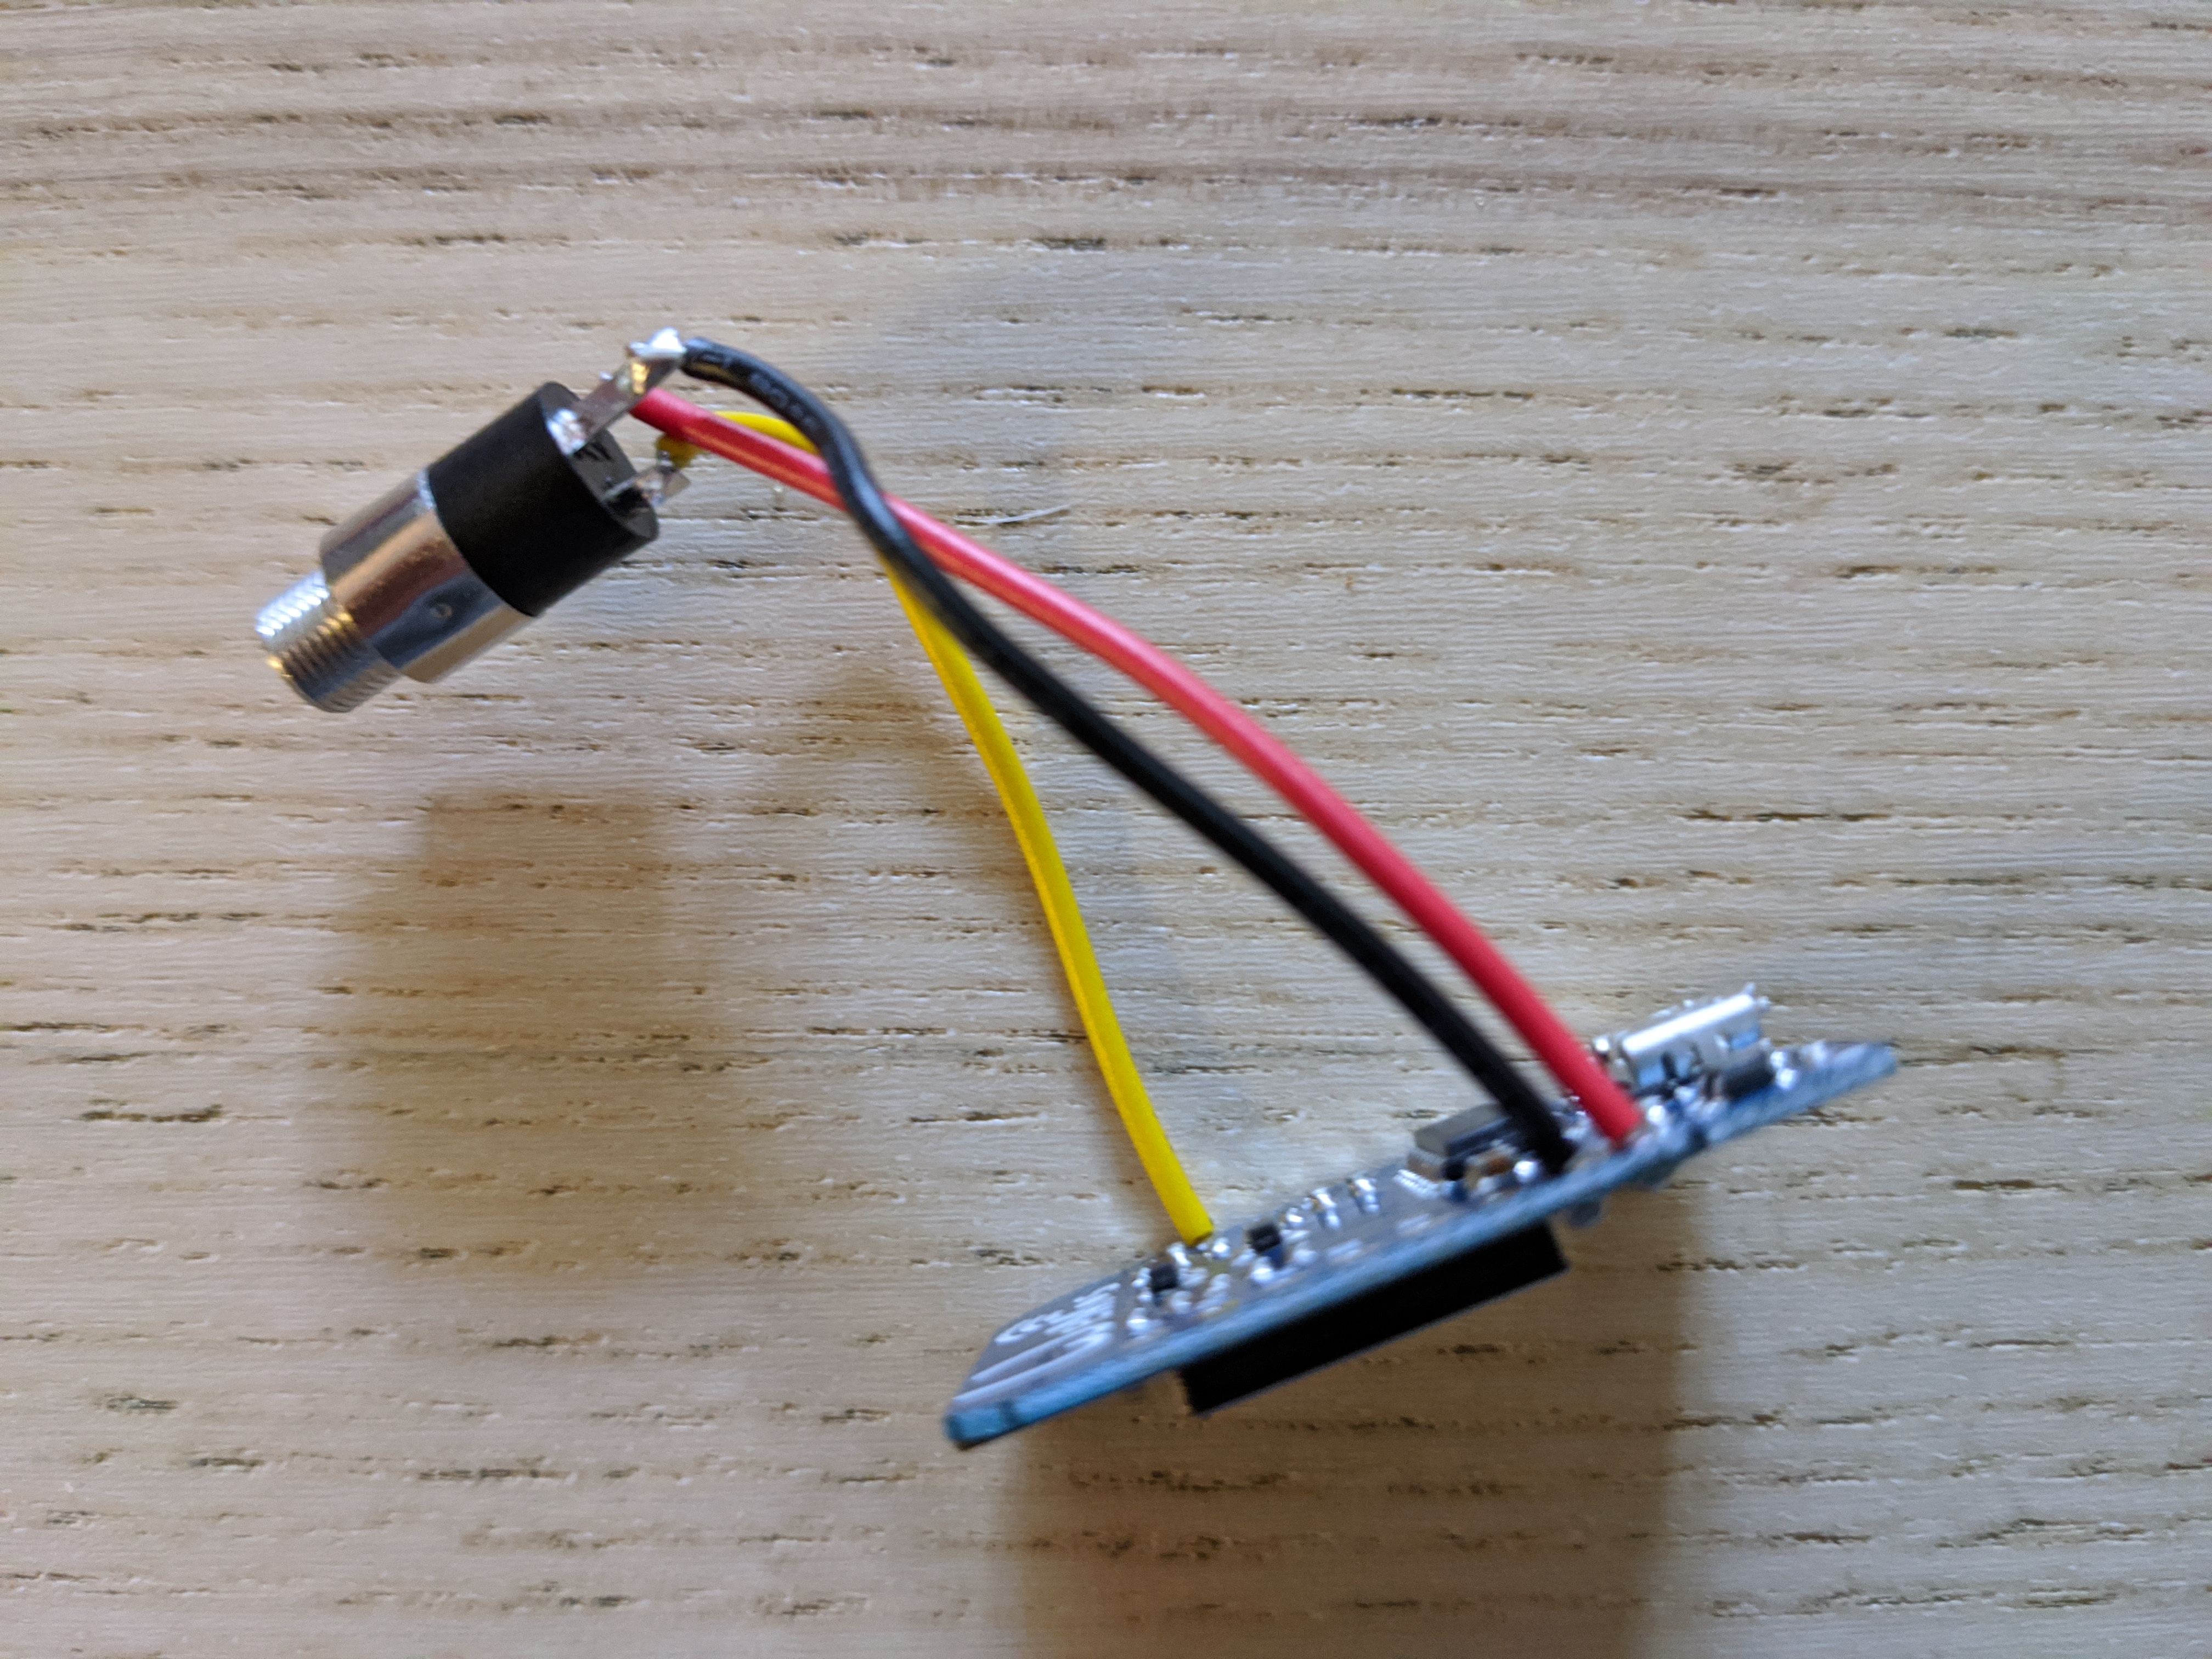
The moisture sensor comes with a wire that has a small connector at the end. We need to remove that connector, and replace it with our plug:
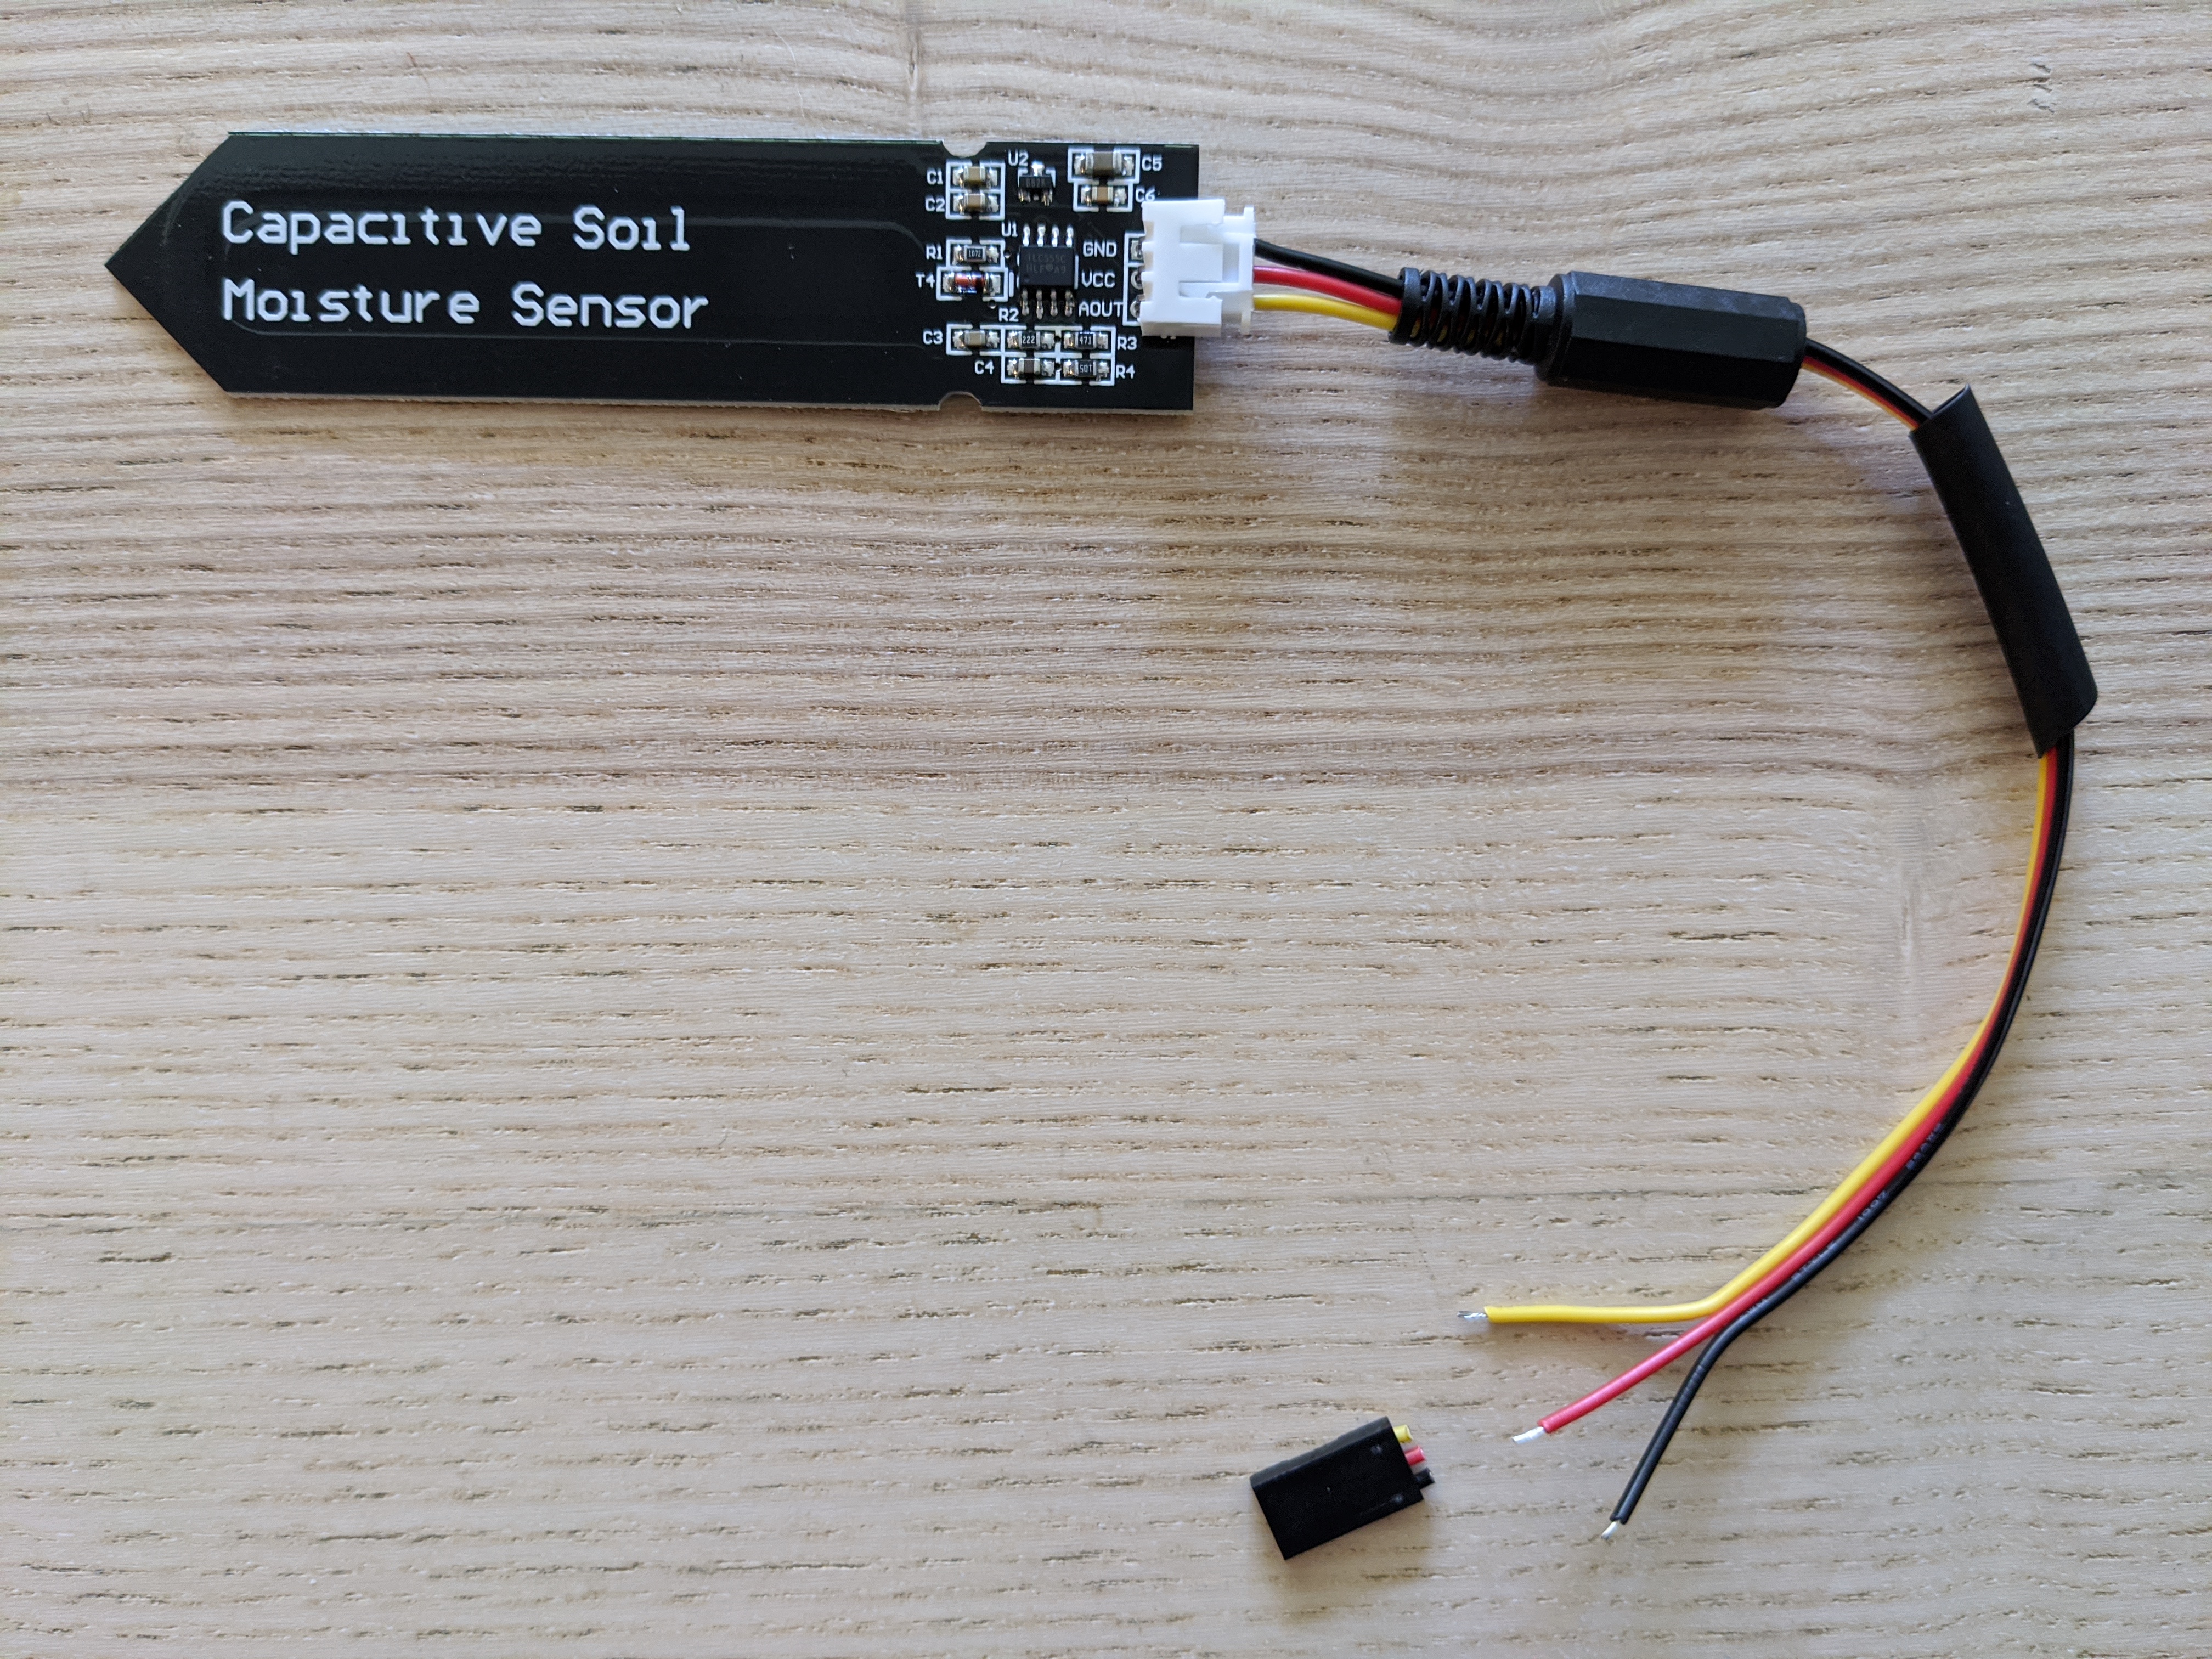
Note that in the photo above I inserted the plug enclosure and a small piece of heat shrink tubing in the wire before soldering. I also split and stripped the three wires, so that we can solder them to the plug next:
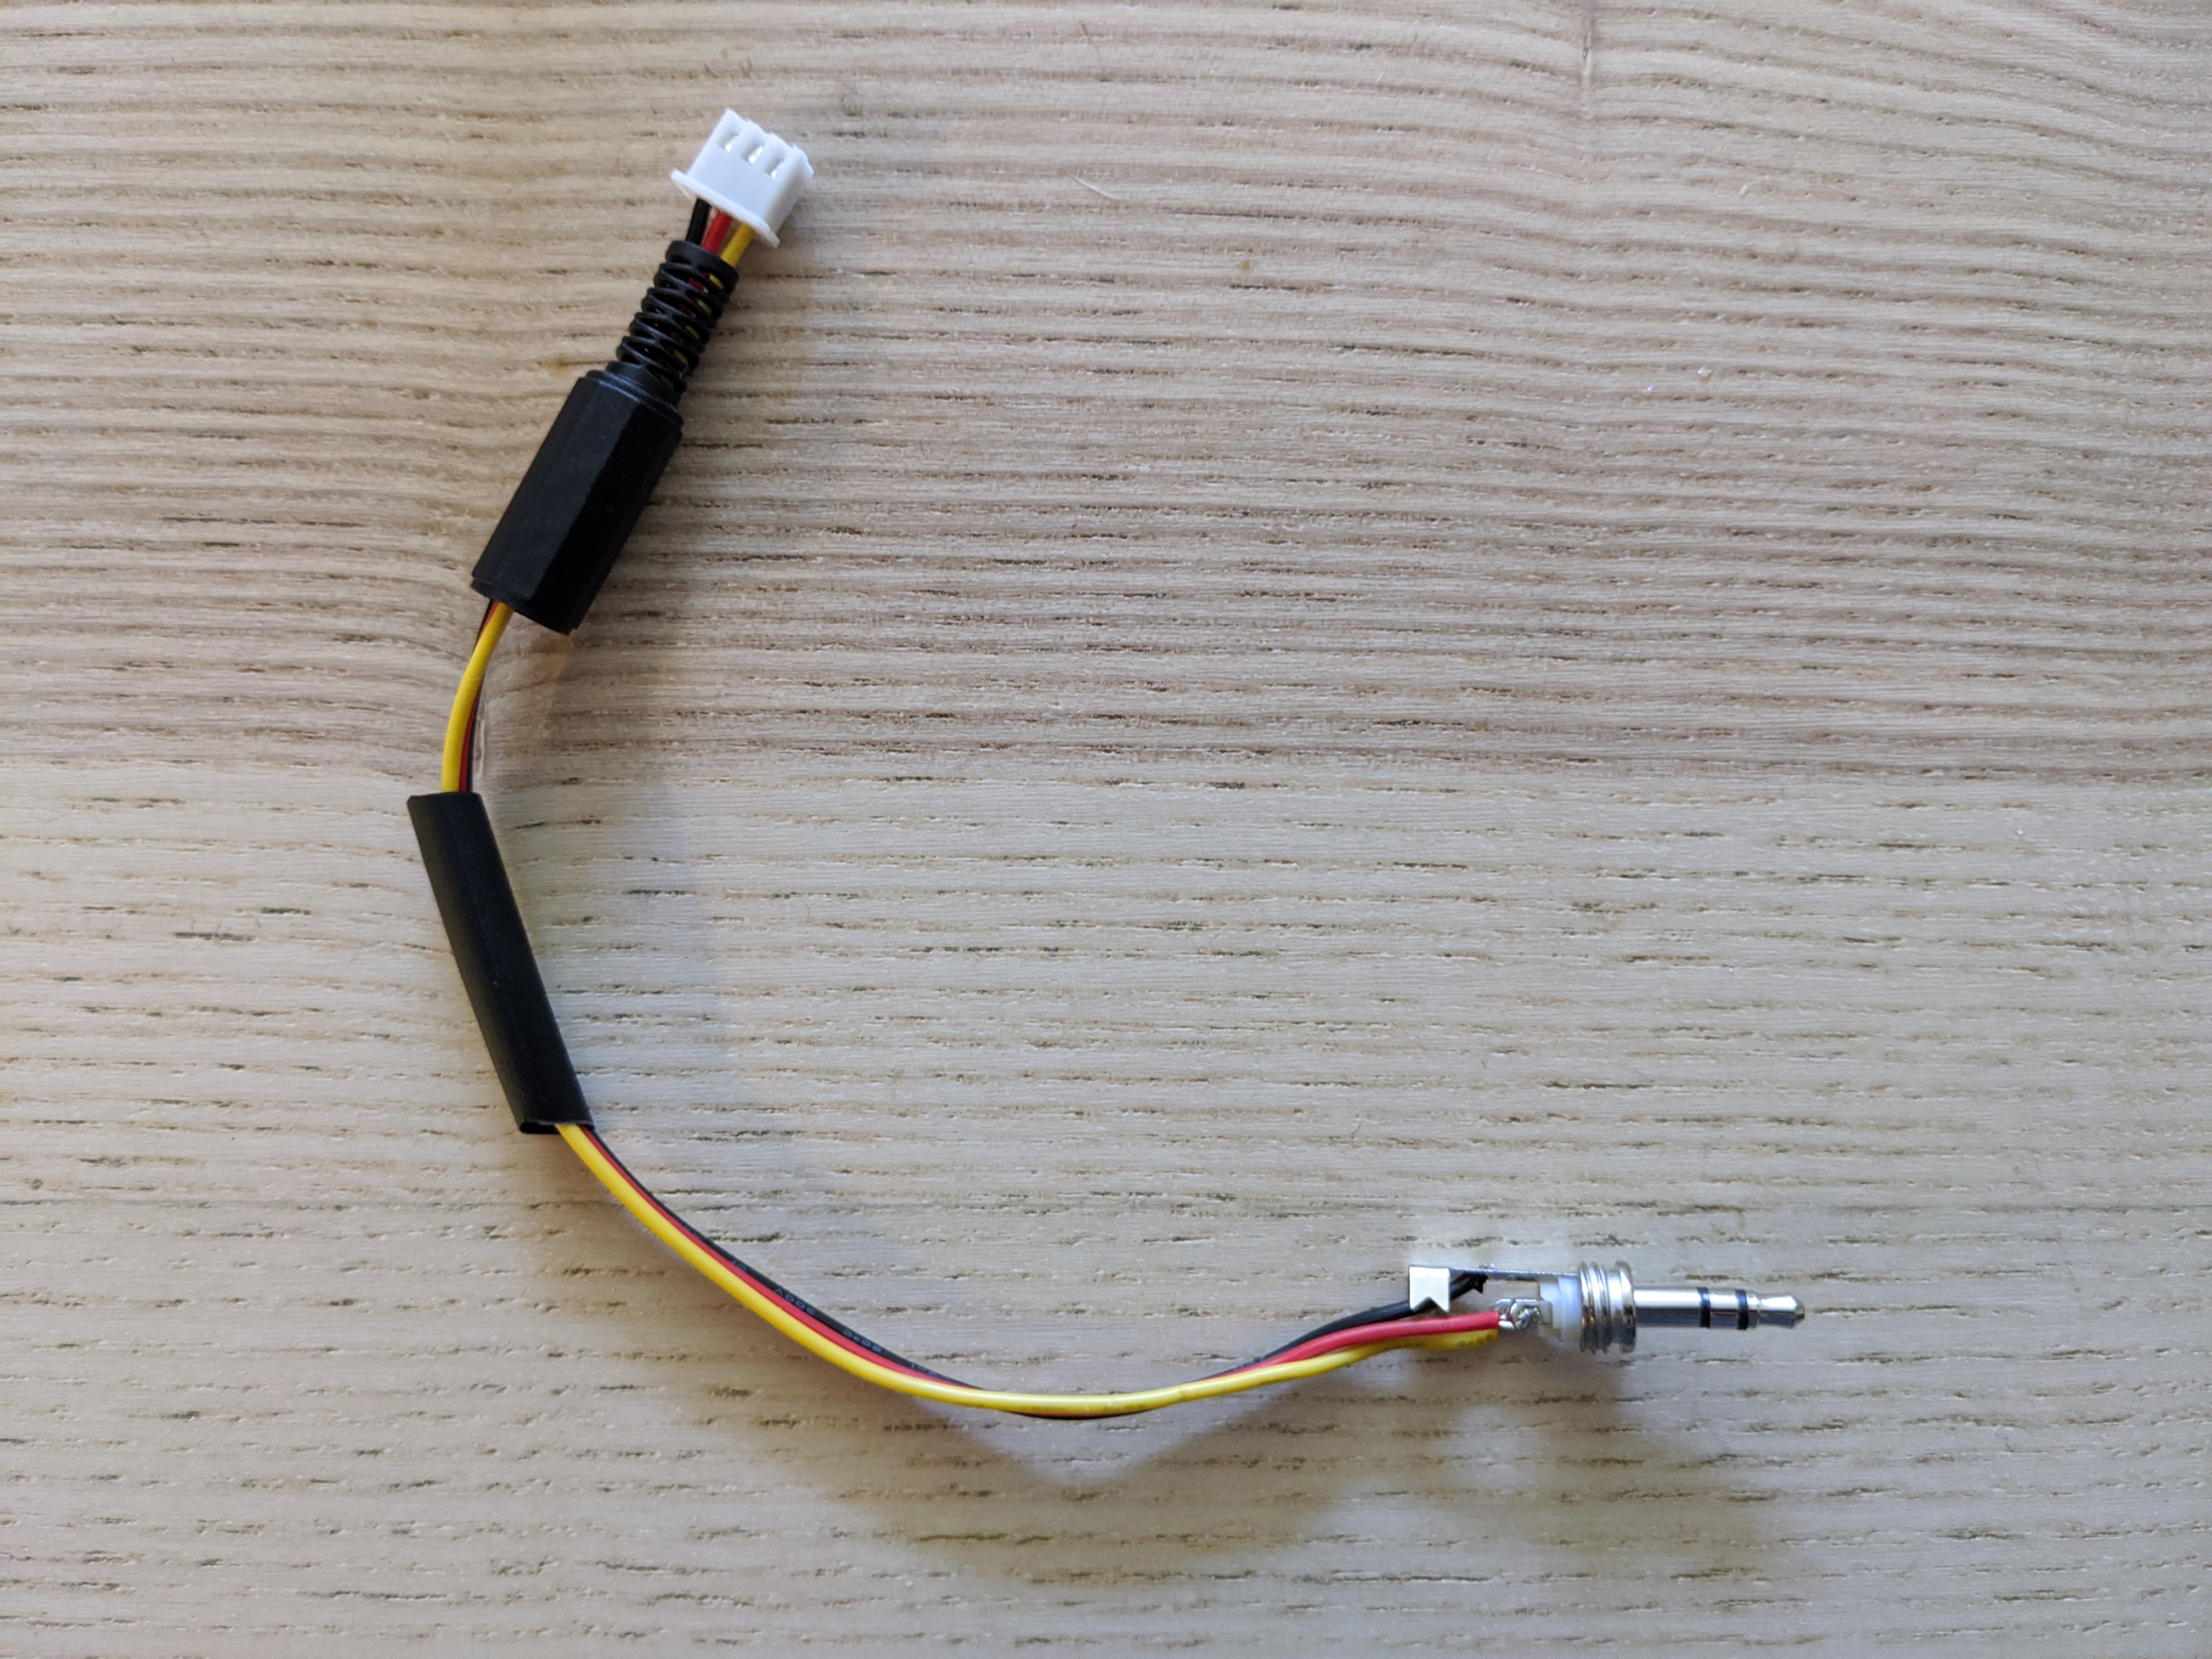
Once we have soldered the wires to the plug, we can cover the wires with the heat shrink tubing, and apply heat to tighten it:
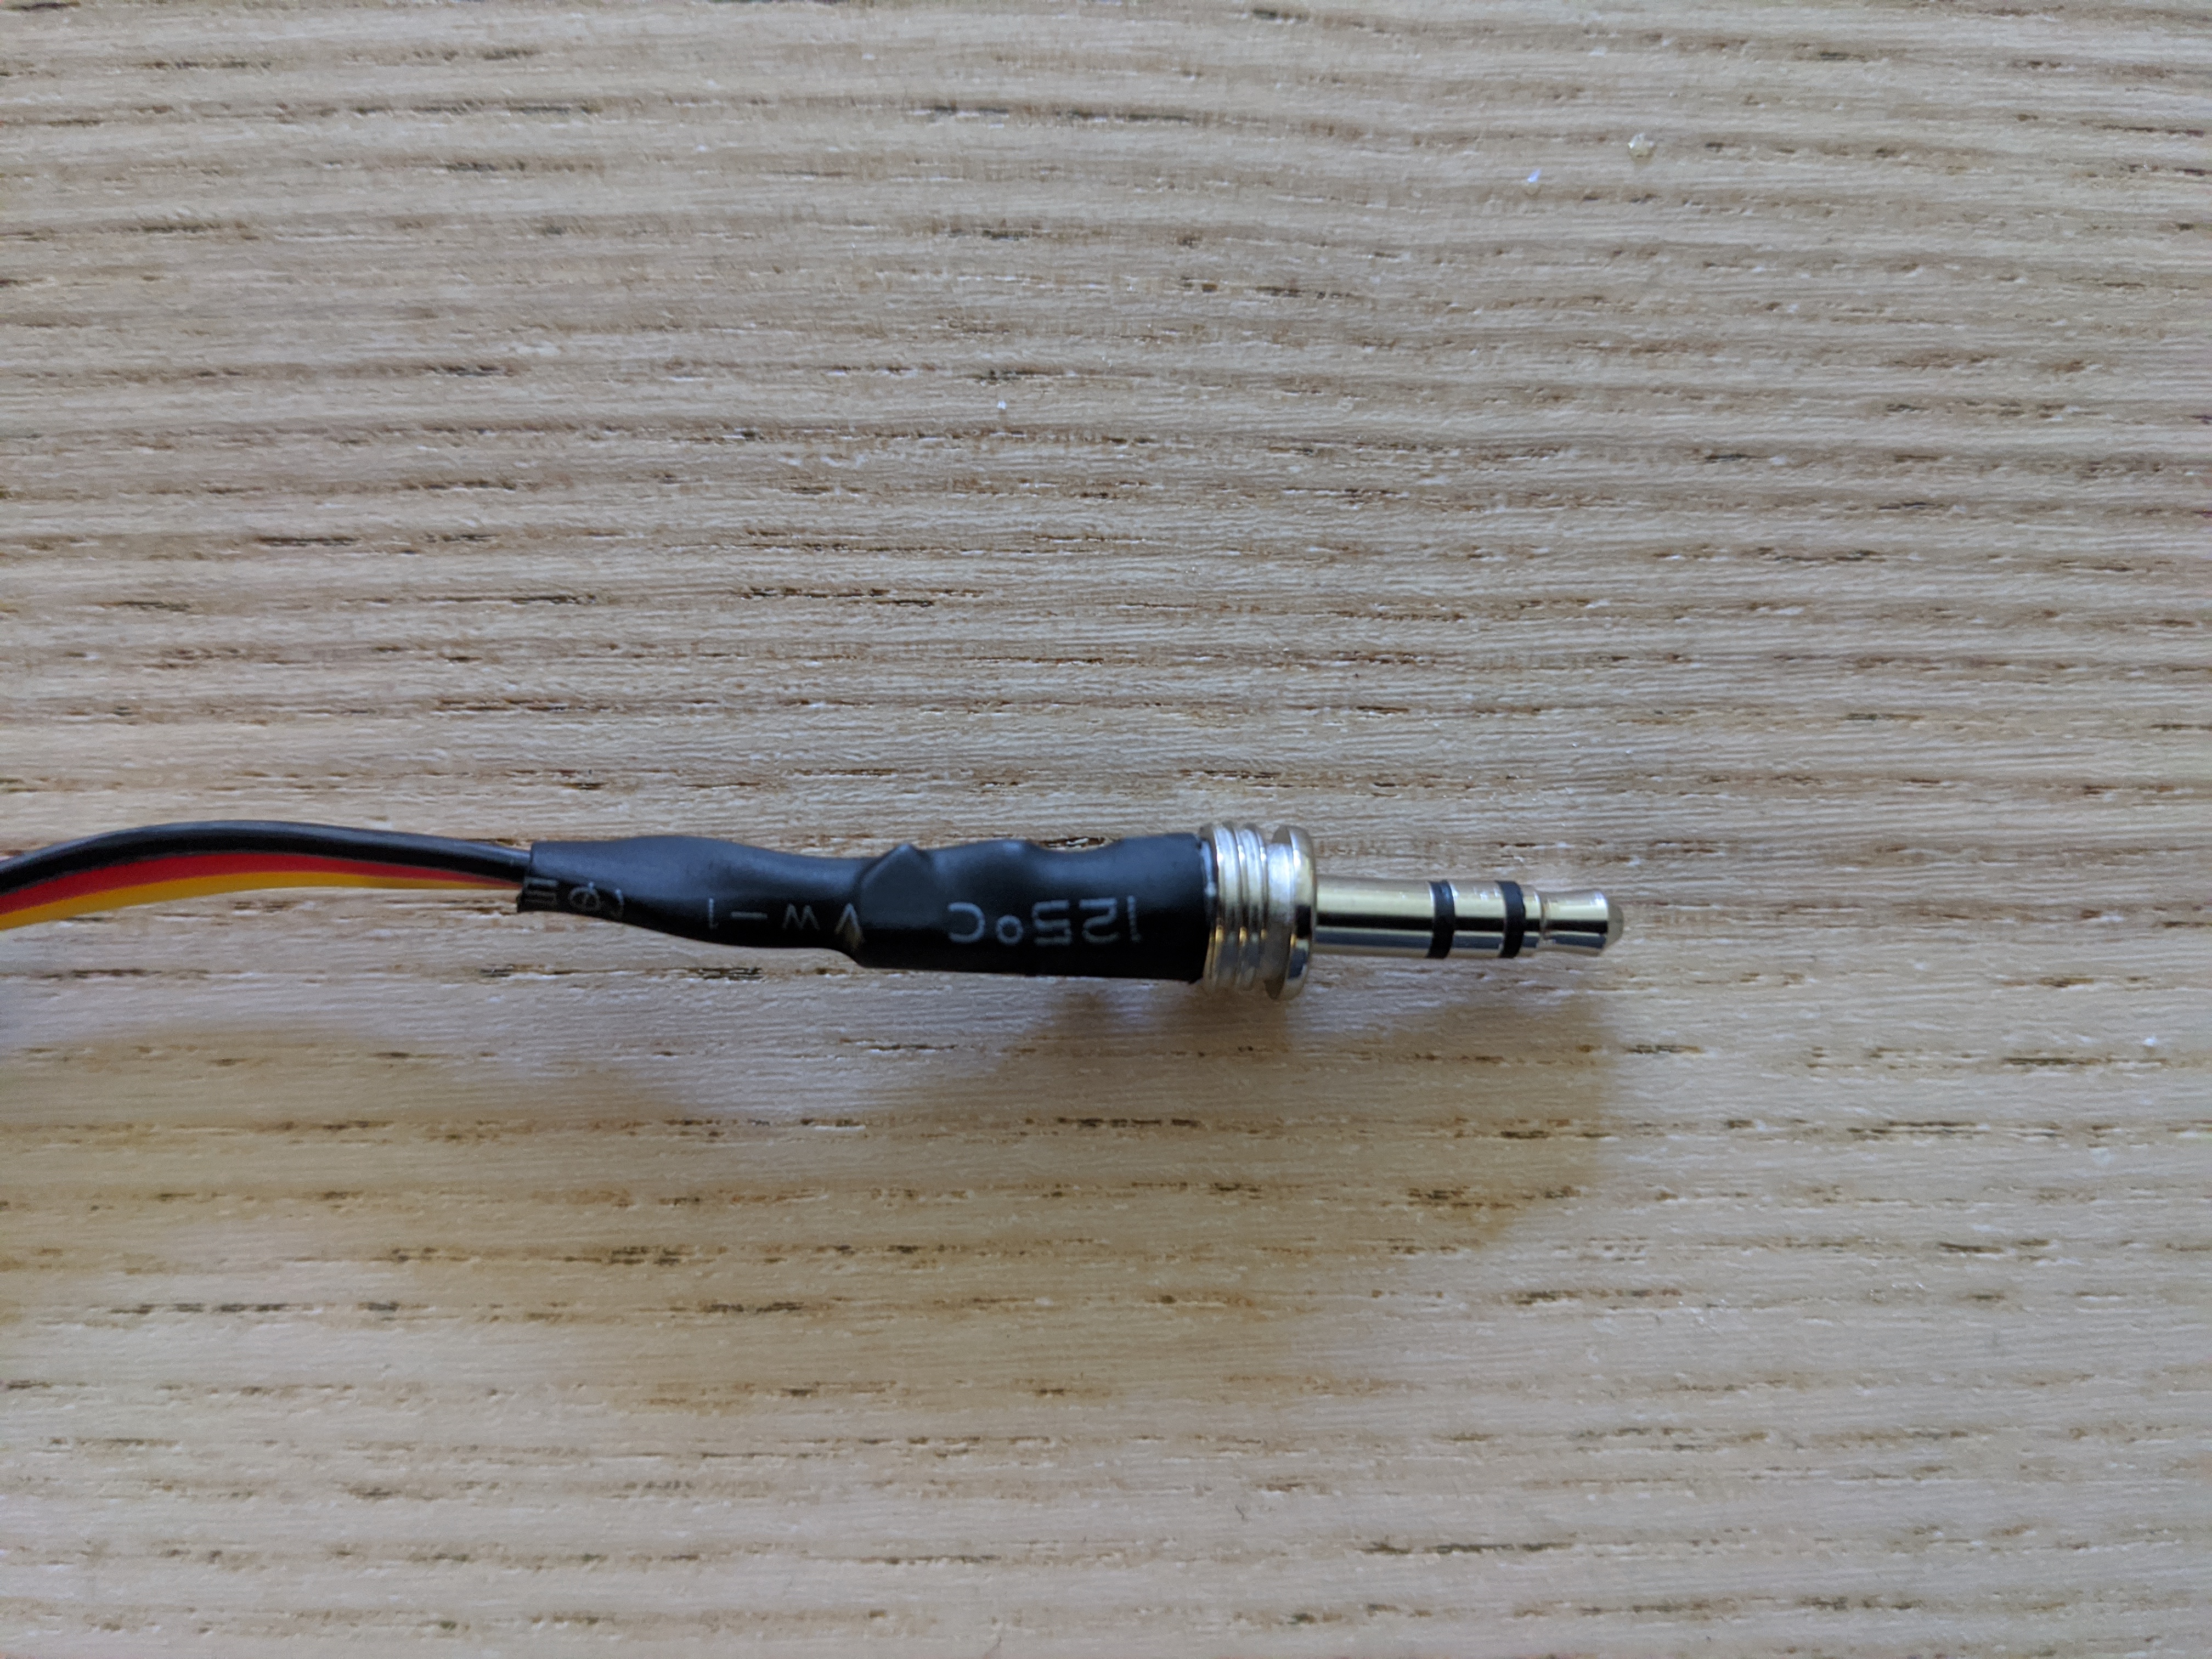
And then we put the plug enclosure back:
Prepare the Arduino
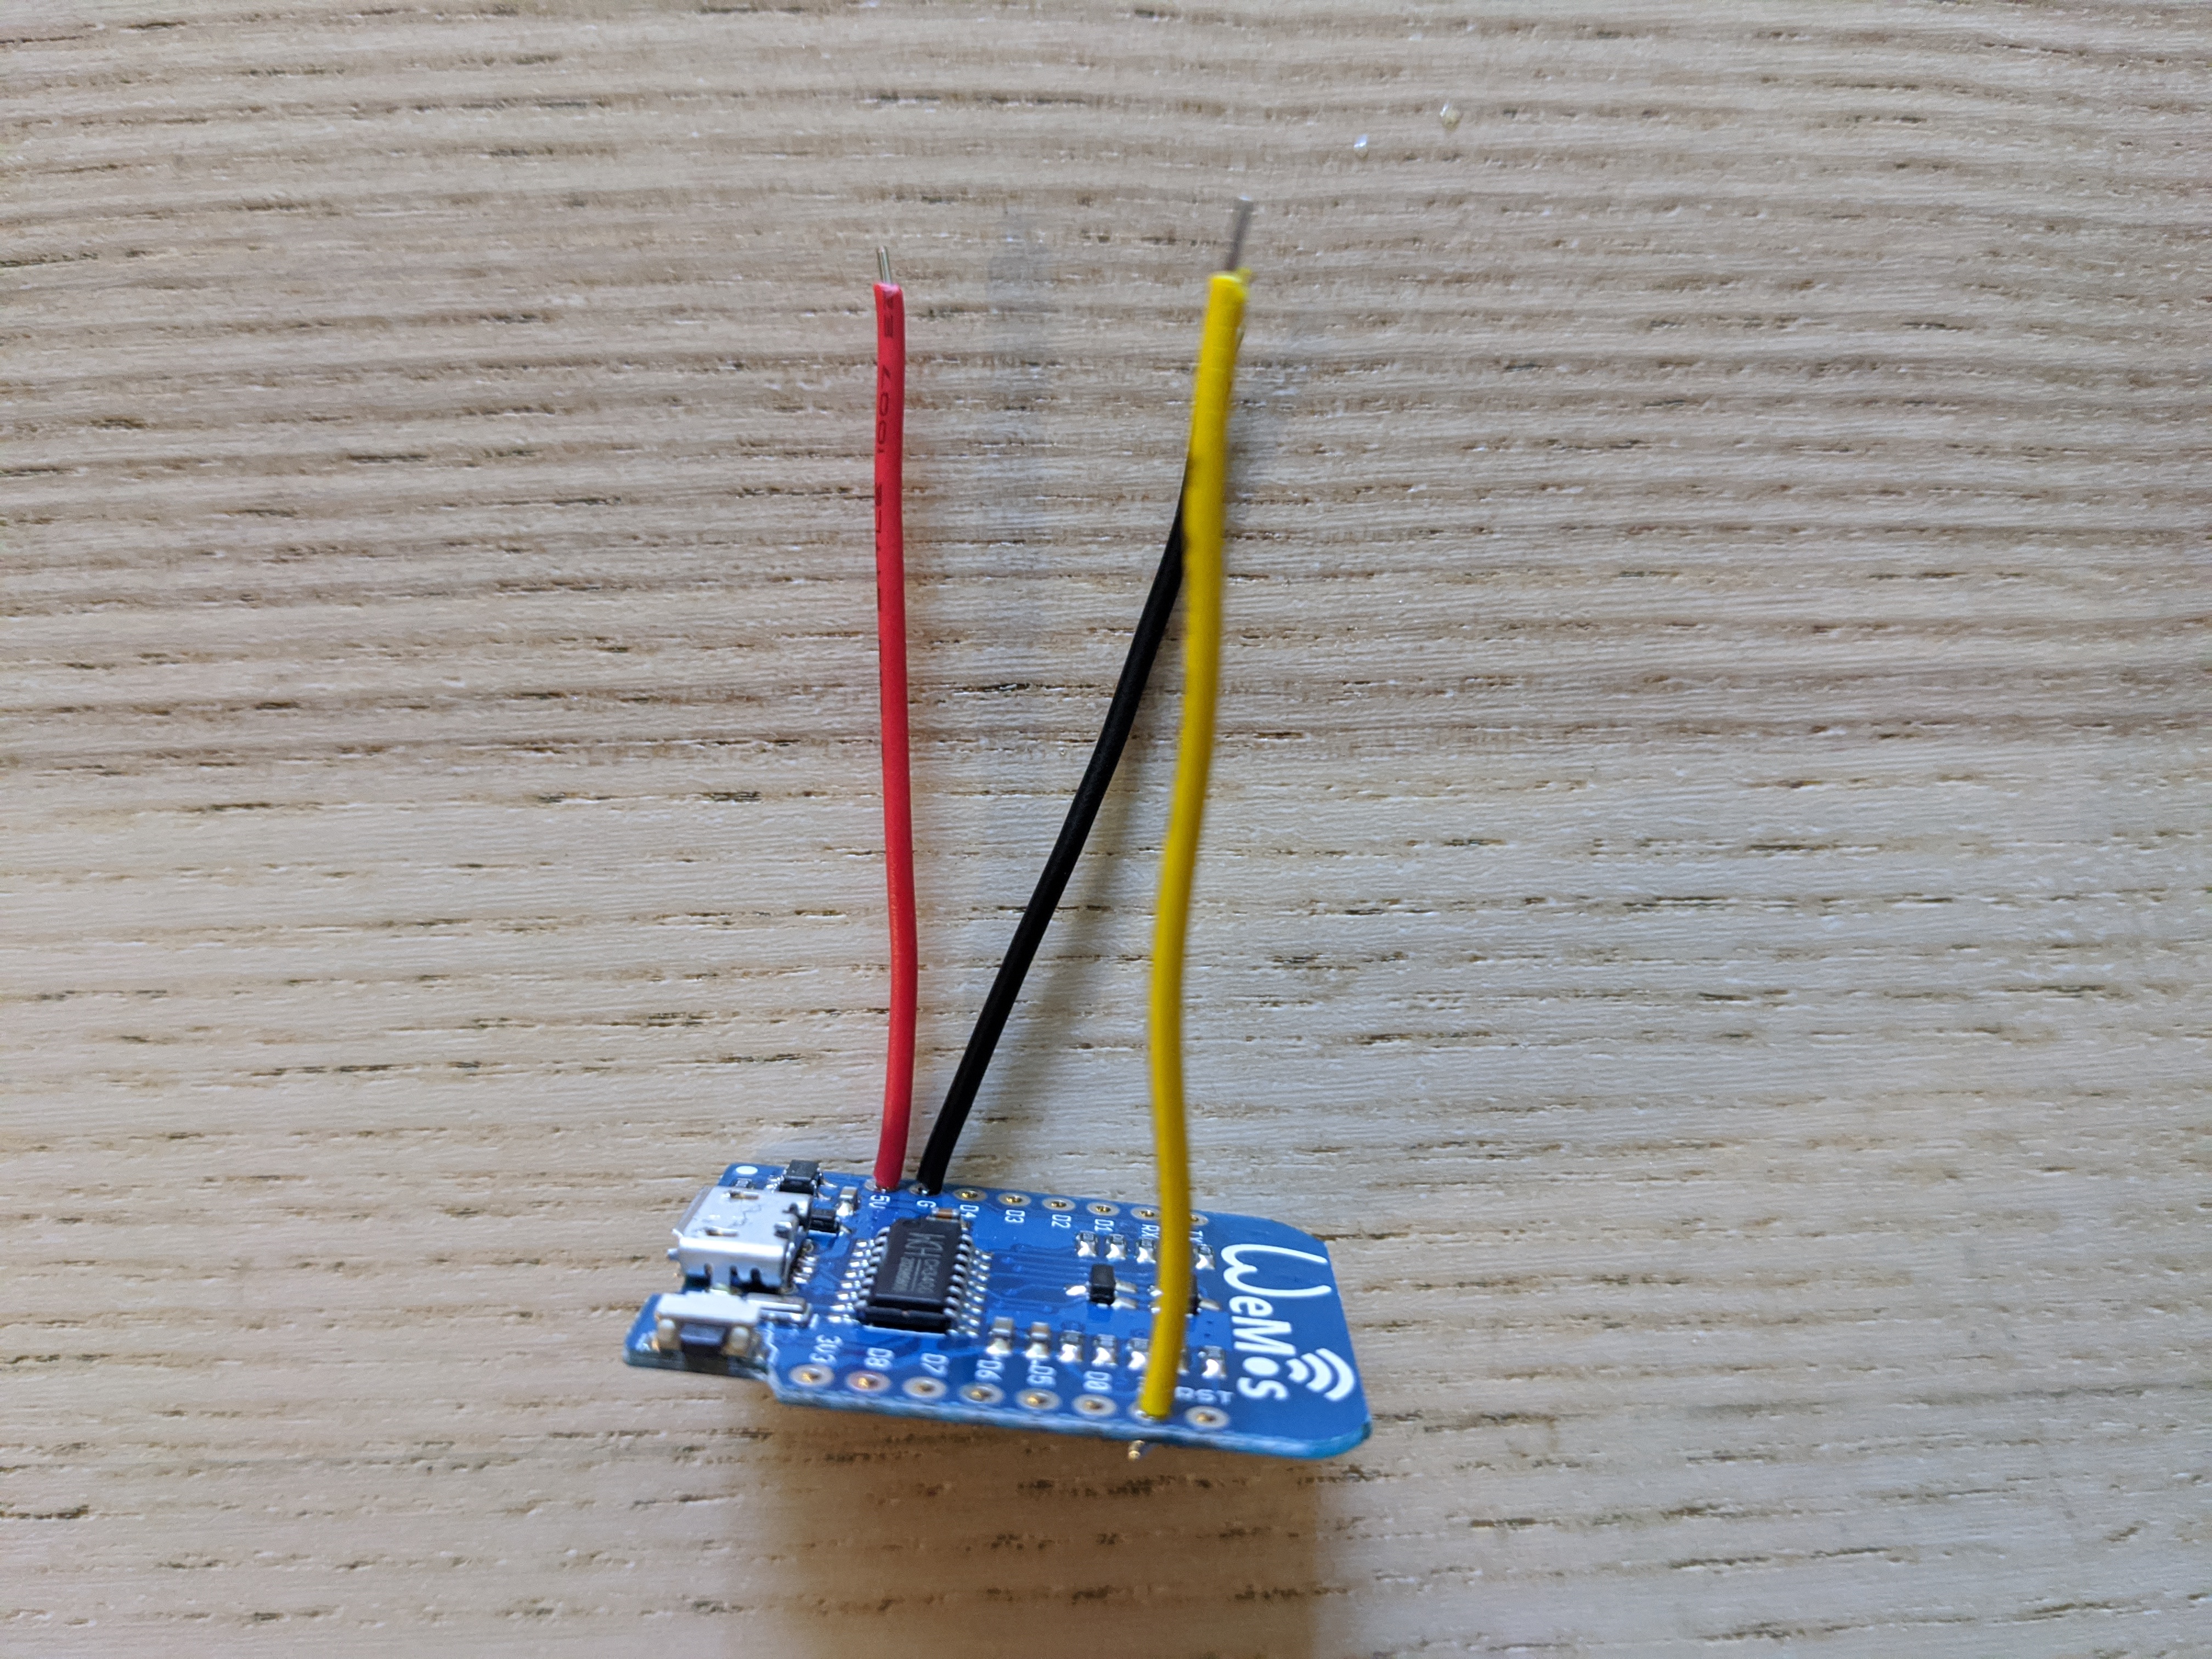
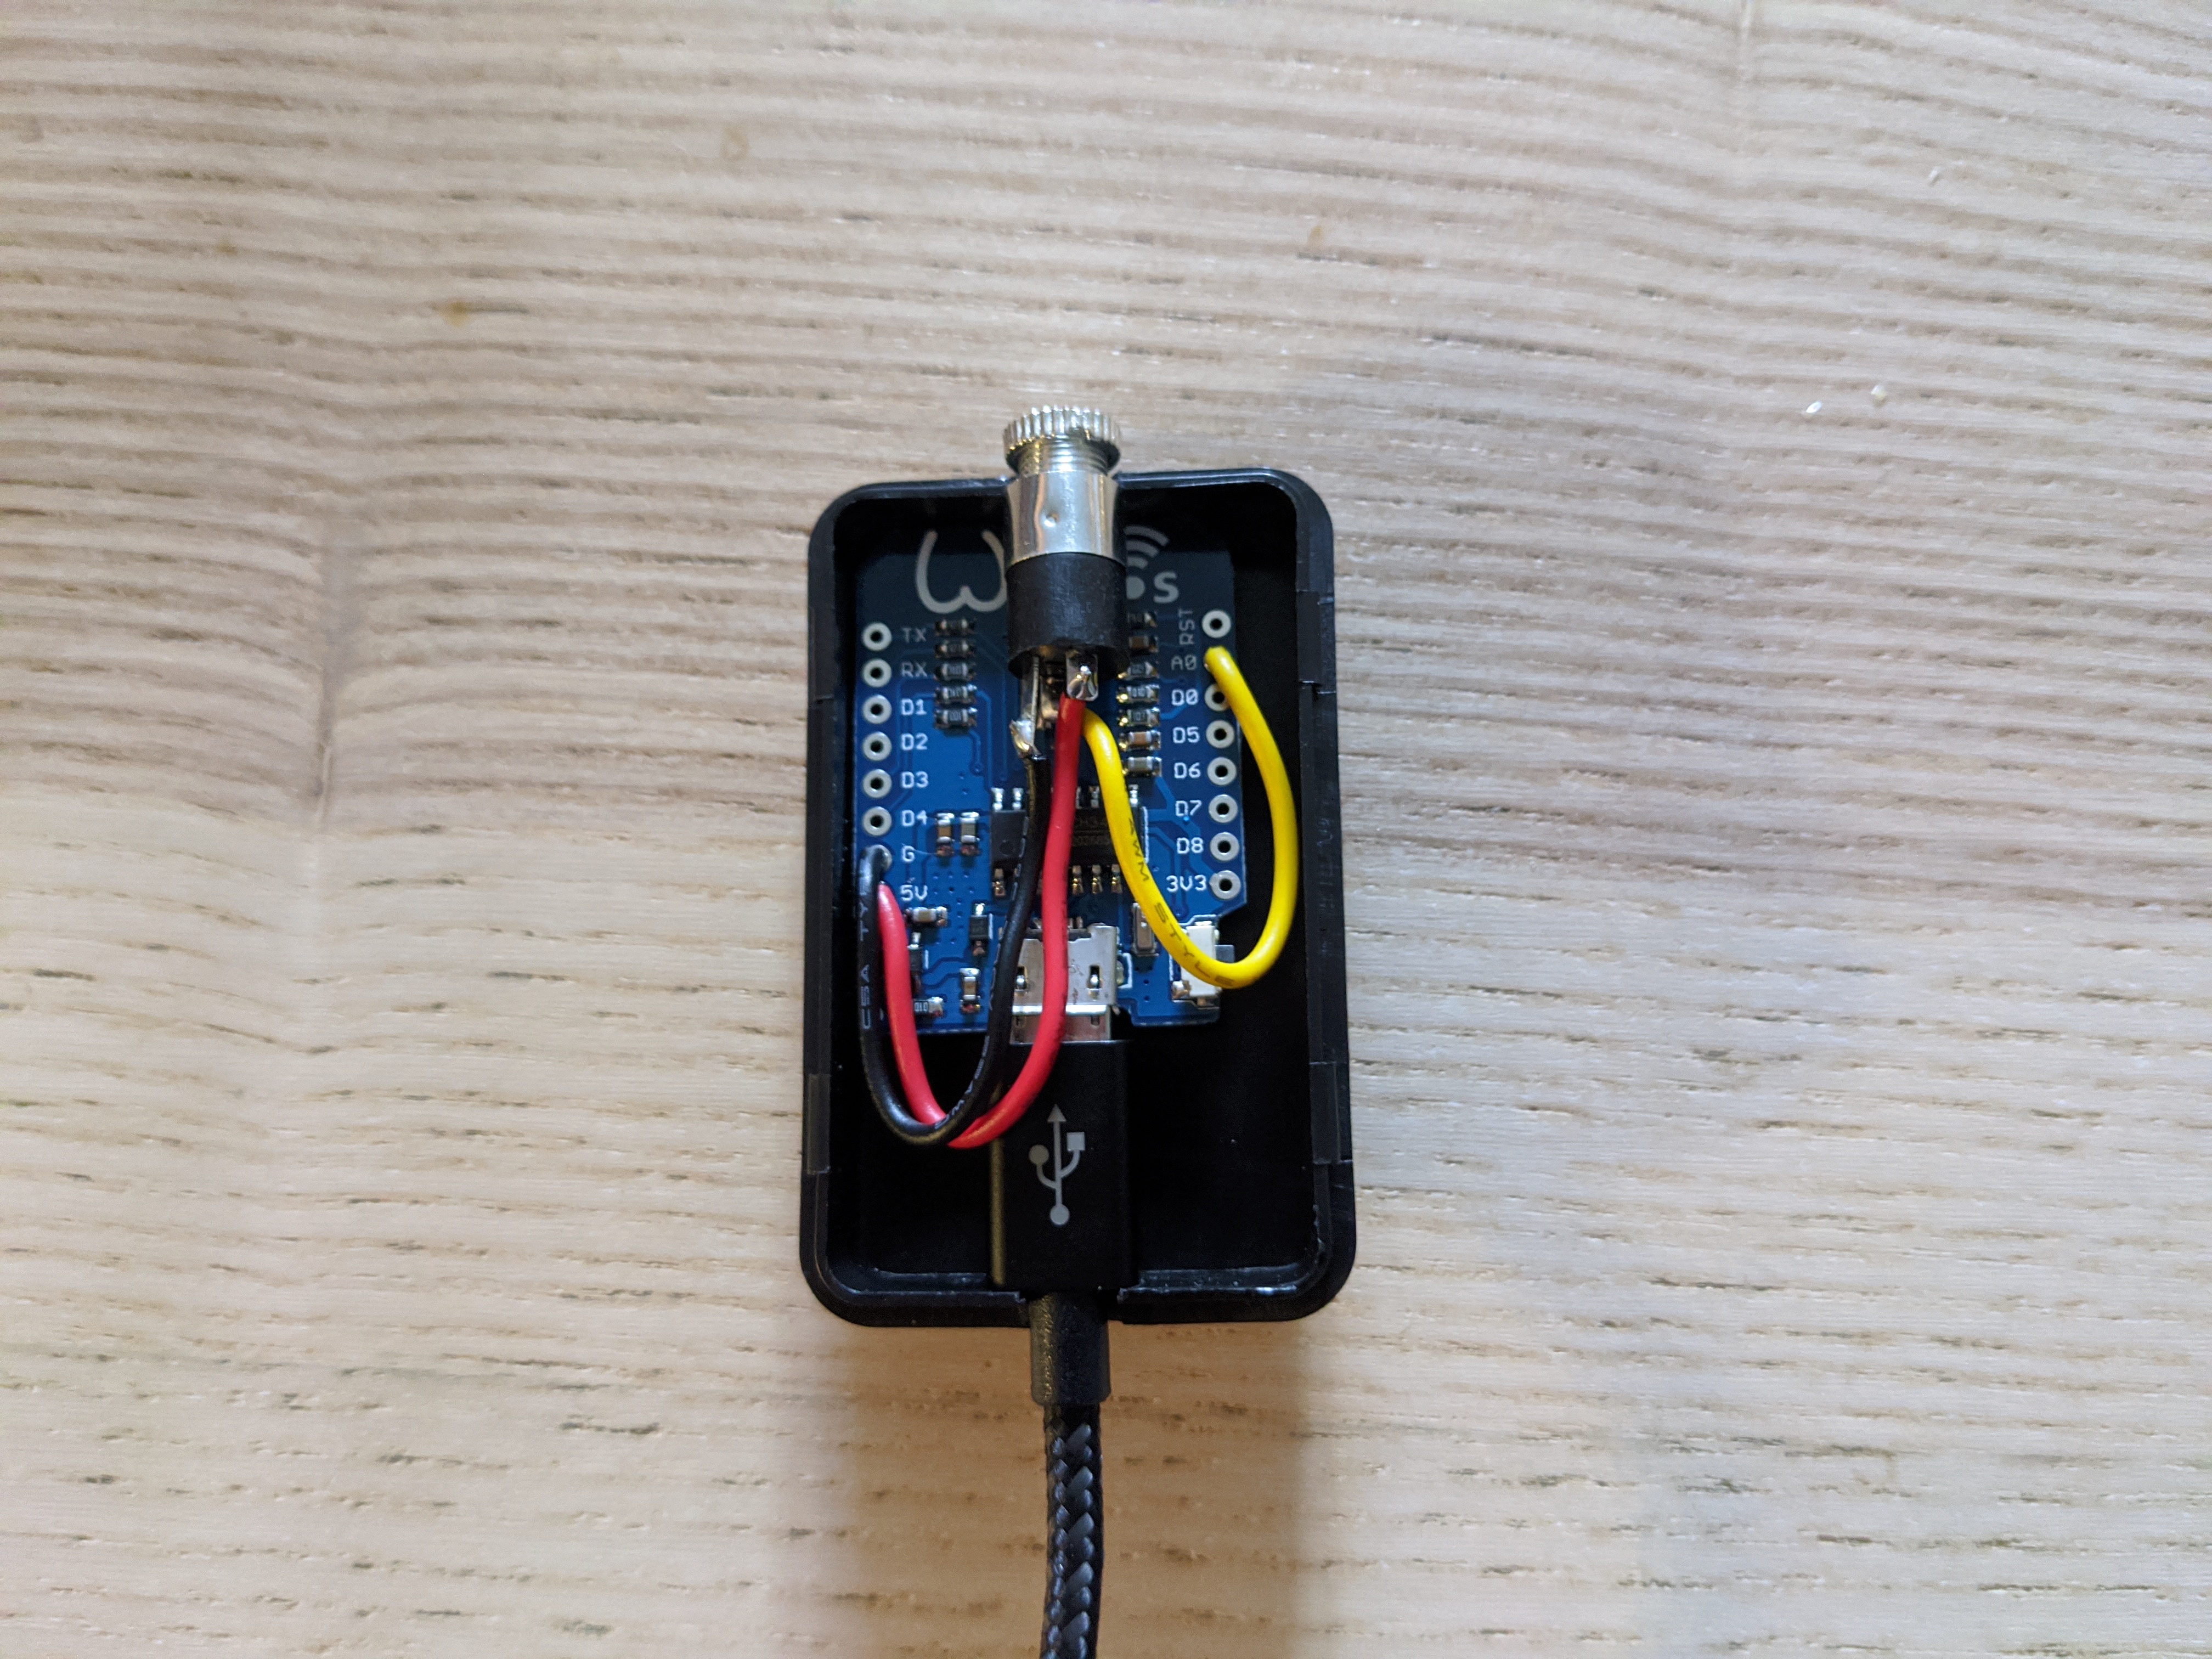
We are going to connect 3 wires to the Arduino: two of them (red and black) will power the moisture sensor, and the third one (yellow) will read the data from the sensor using the analog input. I used wires with colors that match the sensor wires, but you can use any color that you might have.
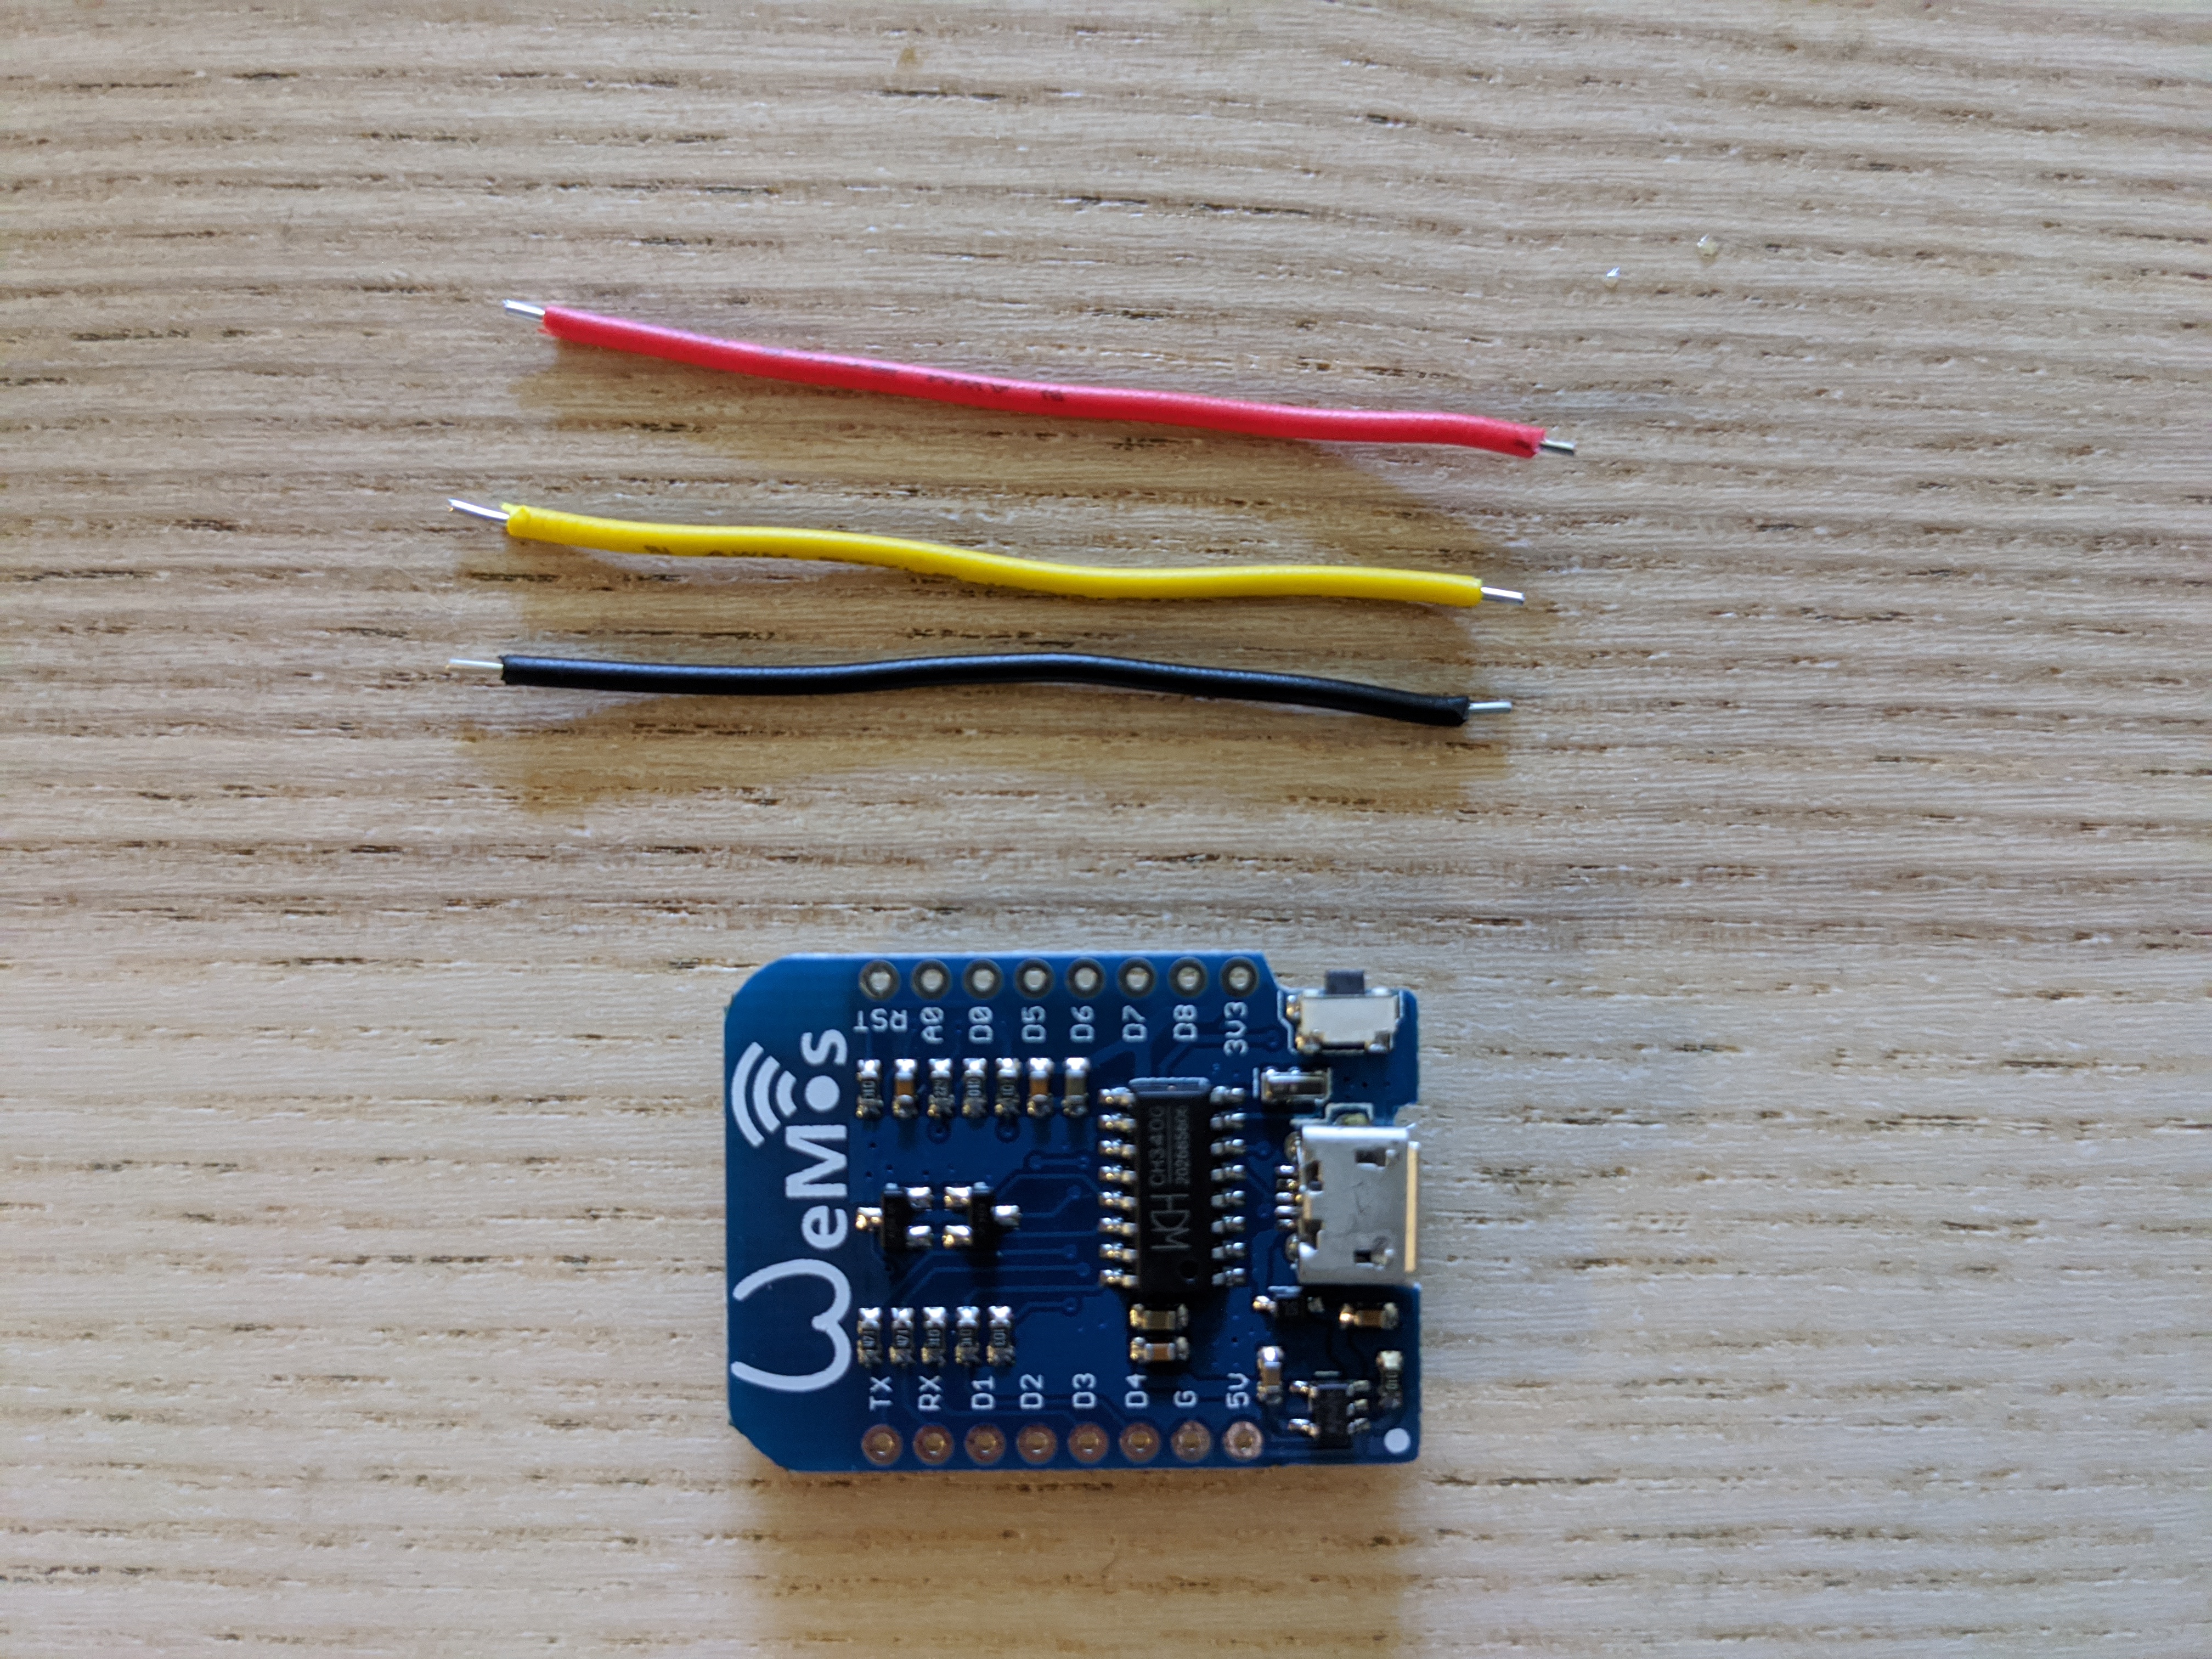
The yellow wire should be soldered to the "A0" connection in the Arduino, which is the analog input 0. The red wire should be soldered to the "5V" connection, and the black wire to the "G" connection (for ground). You can solder them on either side of the board.
The next step is to solder the wires to the jack:
Make sure to solder the wires to the correct pins. I inserted the plug in the jack and used a multimeter to test that the wires were connected correctly by testing for continuity[archived]. It's important that the yellow cable from the sensor connects to the yellow cable coming from the Arduino, and the same for red and black wires.
Finishing the build
The final step is to put everything inside the enclosure. The project box that I used already had 2 holes that are perfect for the jack and for the USB cable:
And here it is, completely asssembled:
Creating an account with Adafruit IO
We are going to configure the Arduino to send the data to Adafruit IO[archived], where the data will be stored and visualized. You need to sign up for the service, which is free. Once you have created an account, log in and write down your username and your "AIO KEY". This will be used below by the Arduino to connect to the service in order to send data.
Programming the Arduino
The next step is to program the Wemos D1 Mini. You'll need to download the Arduino IDE[archived] and create the following program:
1 2 3 4 5 6 7 8 9 10 11 12 13 14 15 16 17 18 19 20 21 22 23 24 25 26 27 28 29 30 31 32 33 34 35 36 37 38 39 40 41 42 43 44 45 46 47 | |
Installing libraries
You'll need to install a few libraries. In the Arduino IDE, go to "Tools" then "Manage Libraries...", and install the following libraries:
- Adafruit IO Arduino: this is needed to connect the Arduino to Adafruit IO.
- Adafruit ESP8266: this is needed to properly drive the Wemos D1 Mini board.
Once you have installed those libraries, go to "Tools" then "Board", and make sure you have "Wemos D1 R1" selected as your board (or if you have any board, make sure the correct board is selected).
Connect the board to your computer, then go to "Tools" and "Port", and make sure you have selected the USB port associated with the Wemos D1 Mini board.
Calibration
Now try compiling and uploading the program to your Arduino board, by going to "Sketch" then "Upload". Go to "Tools" and "Serial Monitor", and you should see in the window that opens up the messages coming from the Arduino. Every 5 seconds the Arduino should print the capacitance read from the sensor, and the calculated moisture.
In order to callibrate the readings, you need to write down the capacitance value when the sensor is on the air. Next, insert the sensor into a cup of water (be careful to not get the components wet!), and write down the capacitance value. Edit the program and set the variables AIR_CAPACITANCE and WATER_CAPACITANCE to the values that you measured. With these two values your Arduino will output a relative moisture value that is between 0 and 100%, with 0 being the value read when the sensor was on air, and 100% when it was inside the water.
While your editing the program, change the last line so that the delay is 60000 (1 minute) instead of 5000 (5 seconds). This is the frequency with which data will be sent to Adafruit IO, and 1 minute is more than enough.
Creating a dashboard
With the Arduino running, if you go to Adafruit IO[archived] and click "Feeds" you should see a feed that was created for your sensor. You can now go to "Dashboards", click "Actions" and "Create a New Dashboard" to create a dashboard with the data from your feed. If you add more sensors make sure that each one has a different feed name. In the example above we used plant-name.soil-moisture, but you should change the plant-name part for each sensor. My plants are called "Plantie" and "Shambling Mound", so I use a different feed for each one.
Setting up alerts
We'll be using IFTTT[archived] to set up an alert when the plant needs watering. First I would recommend you to water the plant normally a few times, as you would without the sensor. Then, visit the Adafruit IO[archived] website, and check what is the relative moisture value when the plants needed water. This value will be used in IFTTT to trigger a message letting you know that the plant is dry.
After you sign up for IFTTT, click on your profile image on the top right corner of the page, and click "Create". IFTTT allows you to define rules that are triggered for given conditions — "if this, then that". Click on big plus symbol, and choose "Adafruit" as the service. On the next page, choose "Monitor a feed on Adafruit IO". Your rule should look like this:
- Feed: Plant Name - Relative Moisture
- Relationship: less than
- Value: XXX
For value, insert the relative moisture value when you noticed that the plants needed water. I use 10% for my plants, but they like being completely dry.
Click "Create trigger", then click the second big plus. Choose "Notifications", then "Send a notification from the IFTTT app". You can now customize a message that will be sent when the reading by the sensor is below the thresold specified. As a final step, you need to install the IFTTT app in your phone in order to receive the notifications.
And that's it. If you have an questions let me know, I'd be happy to help. Happy hacking!
Comments
You can engage with this post on WT.Social, Mastodon or Twitter.